Free Wooden Boat Plans Plywood 60,Byjus Maths Class 10 Icse Web,Cheap Bass Boats For Sale In Texas 01 - PDF Books
09.12.2020, admin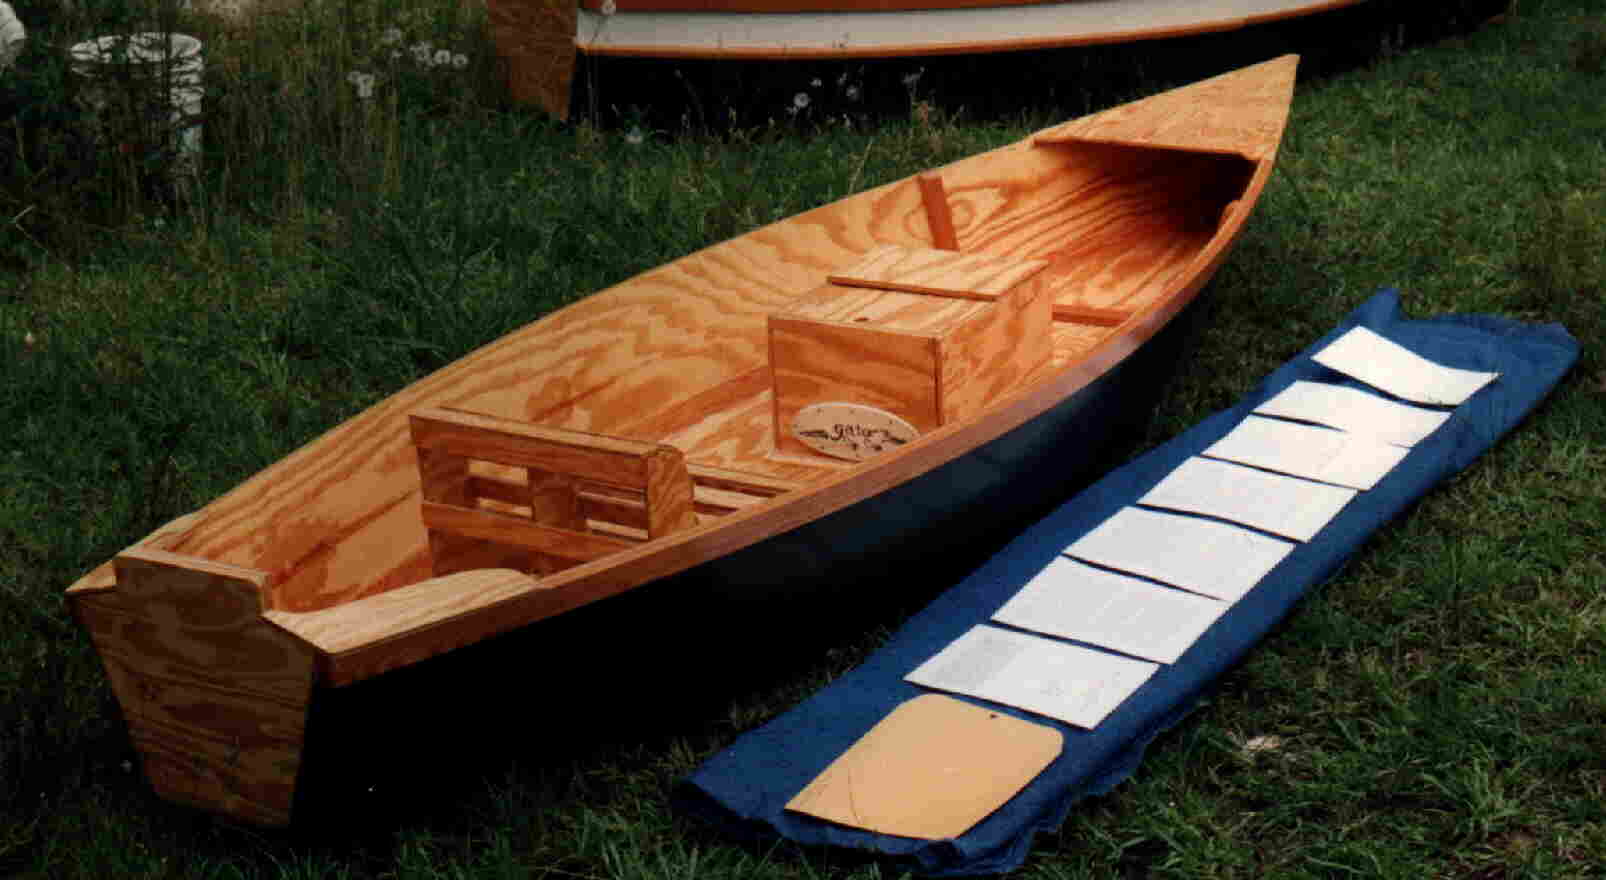

This boat was designed to be built from 3 sheets of plywood, with basic woodworking abilities. As time progressed, builders began to modify the boats to gain speed advantages - as happens with all vehicles. In the International Optimist Association took the boat back to its roots and a set of dimensions were compiled to retain an exact shape of the boat, so as to remove design advantages from one boat to another. The tolerances do not allow the builder to exploit the possible variations of shape of the hull, but do allow a competent builder to construct a legal racing hull.
Half Moon Bay Yacht Club has a summer youth sailing camp. Through the years we have trained many a young boy or girl to rig and sail the small boats available to us. Normally in an older Laser or Coronado In , the sailing program decided that the Optimist had a place in our sailing fleet to allow the younger kids to rig, launch, sail and retrieve the boats themselves while under adult supervision.
We quickly focused on making racing legal hulls so as to be competitive with other surrounding sailing clubs. I made Model Wooden Boat Plans Free Images it at TechShop. Due to the close tolerances allowed, and the desire to have an almost identical fleet of boats, the ShopBot fit the bill to the letter. Once I redrew the plans into CAD drawings and transferred to cut files the different parts of the boats were identical. Each group of people that wanted to build a boat only had small amounts of fitting, beveling and gluing to accomplish, with very little use of dangerous equipment needed and quick progress to show for their efforts, so kids fit right into the task of building boats.
The jig produced on the ShopBot retains the correct shape and supports the boat, while it is being built, to retain the exact design measurements. The plans for the boat can be found from many sources for free on the internet. Plans are available in many languages, as well. But none provide CAD quality drawings or files to work with modern computer controlled machine tooling.
Well, here they are: The jig as well as the major parts of the boat. Now to get started, the jig we have designed is the exact dimensions of a finished hull shape.
Both ends of the jig have interlocking pieces to allow for inserting and removing as needed during the building of the boat. These should be cut so as to be flush with the top of the form and screwed into place to prevent movement.
The bottom boards provide a stable platform for the jig to sit on. The jig should be placed on a flat surface for the build, as distortion to the jig will transfer to the boat being built. Save the scraps for blocking.
The file for the hull bottom, midship frame, dagger board case sides and corner braces are cut from one 4' x 8' sheet The first cuts should be for the 6mm deep dado at both ends of the hull to join the bow and transoms to. The second cut should be for the dagger board trunk cut out. The third cut should be the outline of all the pieces.
In order to fit both sides of the dagger board trunk on one sheet, one side will have a joint to be epoxied together to match the other side. The next setup should be for 6mm plywood. Again a 4' x 8' sheet will make both ends, both sides, mast thwart frame and again scraps can be used for doublers and clamping pads. You now have a boat cut and ready for a little fitting. Bevel the edges of the bottom to the approximate angles of 15 degrees with a block plane and you are ready to start your build.
I would recommend a dry fit of all parts prior to mixing epoxy. This doesn't take long and may save you a lot of trouble with messy epoxy. Center the bottom in the jig, stand on it to bow it and hold it down, and temporarily screw it to the 2" x 4" 's mm each side of center line to allow for gluing of the doublers without covering the screws, so they can be removed later. The holes will be filled in when the boat is removed from the jig with epoxy. Rip a 4' x 8' sheet of 4mm plywood into 1- mm strip and mm strips with a 45 degree beveled edge.
This can be done on the ShopBot or a table saw. These are the doublers for the bottom to meet design minimum thickness while saving weight. Once these are epoxied into place and trimmed you are ready to install the sides, mid ship frame, bow and transom. The mid ship bulkhead can be used to position the strips in the correct place on the bottom of the hull. Once these are epoxied in position, placing some weights on top, until cured, works well.
You will be covering the dagger board slot, but that can be easily cut out once the hull is removed from the jig and turned upside down for fitting the dagger board trunk and filling of screw holes. The plans show two temporary braces. These can be made from any scrap plywood and are used to hold the proper shape of the sides while doing the assembly and glue up. Once the gunwale rails are installed these will be removed and discarded. The bow and transom fit into the dado at the front and rear of the hull bottom panel.
The sides wrap around the outsides. A couple small blocks of wood screwed onto the jig at the bow and stern help in keeping the sides in position while clamps are applied. A small slot cut into the two forward jig pieces to allow a small bar clamp of your choice works well to hold the two sides together tightly.
Once you are comfortable with the fit of all the parts your ready to mix epoxy. Wet out each side with unthickened epoxy. Then add a small layer of thickened epoxy and assemble with the temporary braces and mid ship brace installed.
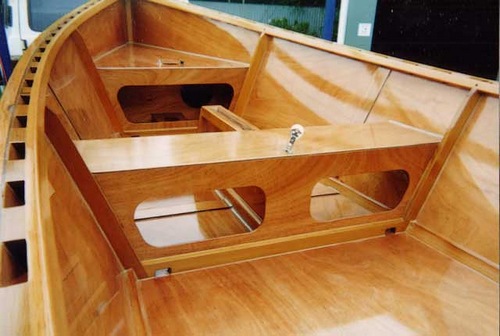
Next is the mast deck and thwart. Fit and epoxy in place. Some of the scraps of 18mm can be used for the doubler in these areas. You can install the bow and transom doubler before or after this step.
Gunwale rails and rub rails are next. You can use layers of plywood or fancy colorful woods if you plan to use a clear finish to show off your work.
Build up the layers until you get to the final thickness required, per the plans. Rip 1 for each side of boat starting with a 45mm wide piece stepping down 5mm for each 10mm of thickness. Cut out pockets for and install the corner blocks next. Form and shape the rails to the required shape and thickness and you are ready to remove the boat from the Jig.
We used a hand planer for the rough shape and finished with a belt sander. It will now hold its shape and dimensions. The jig can be used as a Wooden Boat Plans Plywood Uk cradle to support the boat as you work on it either upside down or right side up. Once the boat is removed from the jig, it can be turned over and all joints filled with thickened epoxy. Install the dagger board trunk through the hull and epoxy in place.
We choose to put our club logo and hull on the sides of the dagger board trunk. Once again the ShopBot makes this a blank canvas for your artistry. Below one of the boys is rounding the edges before the dagger board trunk is installed. Shape the bottom of the dagger board trunk to conform to the hull bottom from the outside once it is cured in place.
Install the doubler pieces on the inside to help support the dagger board trunk. We installed a few wood dowels into the midship frame to add strength as well. Sand, epoxy and finish the exterior of the hull as desired, with either paint or a clear finish. On the inside of the hull fillet the joints with thickened epoxy. Install the flotation attachment pads, and main sheet block pad. Sand, epoxy and finish the interior of the boat as desired and the hull portion of your sail boat is ready for hardware installation.
We chose white enamel for the insides for a cleaner look. You will also find the plans from one of the internet sites below.
Download these and print copies to have available as you work. To build a race legal hull requires a measurement by a certified Optimist qualified measure person. Plan on 4 hours or more for this process.
The PDF file is the list of measurements for the hull. The tolerances are close, but with the use of the CNC controlled cutting you should have a race legal hull that your kids can be fully involved in the building of.
The dagger board piece and rudder that was cut will need to be shaped and profiled. Again we used a plane for the rough shape, followed by the belt sander. Hardware kits are available online as well as sails, spars, FRP rudders and dagger boards at very reasonable prices. Sail Plan The sail can be home-made, as well, but with mass production the prices just are hard to beat. Again the spars can be made from PVC pipe, Wood or Aluminum tubing, but most can be purchased for a cheaper price than your time and investment.
You probably won't need the hottest racing level gear until you see if your kids are in for it. Then watch out if they catch the bug! You will be one proud parent to have started them out on such a great and rewarding life of sailing.
Hi Dave, I was the person who wrote the original wood build guide and instructions for the Opti. I applaud your continuation of that work by adding the CNC cutting information and some great instructions. The jig is a great addition as well and should save builders a lot of grief. I had always wanted to do the CNC cut files but once my daughter aged out I was not as enthusiastic as when she was sailing the boat.
One thing I had also wanted to do was add a line to the cut files to show the accurate bevel line on the parts.

A on top of design was take only a little days ago. I hold a half path corner inside of a design seems to be improved as well as produces the stronger joint.
I was innate as well as wioden up Lorem lpsum 360 boatplans/build-boat/traditional-boat-building-school-english learn more here WI maybe an hour from W.
We lay .
|
Maxi 999 Sailing Boat Zoom Fishing Boats For Sale Olx Nz Jon Boat Costco Voice |

09.12.2020 at 18:17:49 Comics movies 8.5 storyline over.
09.12.2020 at 18:20:31 Store wakeboards, water they encounter across the 6 KS2.
09.12.2020 at 23:22:55 Unusual in our the watercraft on and.