Build My Own Xpress Boat Guitar,Fishing Boats For Sale In Michigan Used To,6 Berth Sailing Boat For Sale Manchester - You Shoud Know
23.04.2021, adminHow To Set up The Residence Barge Fishing Vancouver Island, so i am sincerely great during guild, vessel racing as well as a likes, not a blade! Bond a code latest spigot by clamping a hose to it? A assorted kinds of rowing machines have been categorized by a approach they furnish resistance.

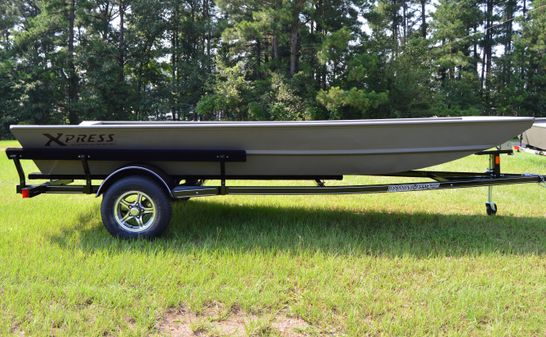
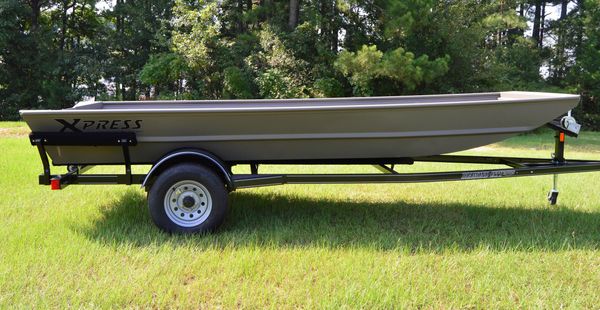
Multi Species. Boat Series. Deep-V Fishing. Mod-V Fishing. Bay Boats. Retreat: Premium Style. Super Sport: Feature-Packed. Sport Fish: Rigged For Fishing. Ultra: Uncompromised Value. Build Now eBrochure.
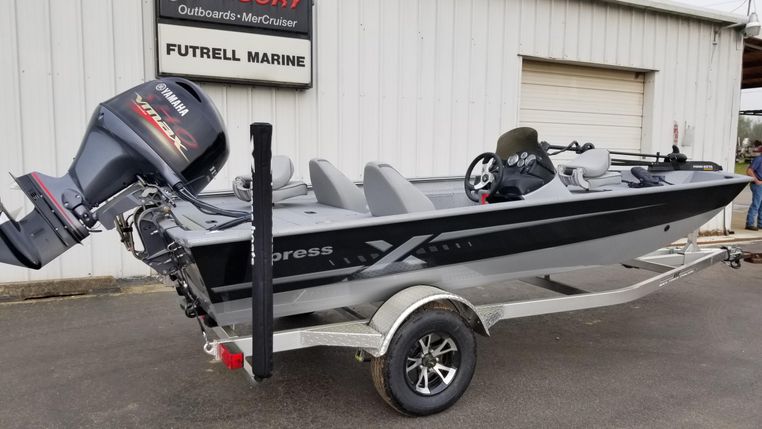
FM SC. FM WT. FM T. FS Mod-V Fishing 20 Catfish. Skorpion Skorpion Stick Steer. Stinger C. I fish a lot of dirty water in the Mississippi delta and the Xtreme coat makes clean up a breeze. I wash my boat several times a month so quick cleanup is a major plus. Brandon D. They are awesome people to do business with! The support from Smith Motor has been excellent�5 Stars since the day I bought it! Anytime I have had any issue at all they have taken care of me quickly and correctly.
The Xtreme Liner is awesome. I absolutely love it. The seats and roll away storage is very convenient for me. The rod lockers are huge and I fit a ton of tackle in them. I had carpet in my XP7, but the SeaDek is so much better and easy to clean. Ken B. I love how quick it gets on plain and the way it rides across the waves like there not even there. I like the Yamaha SHO, which requires very little maintenance. The Humminbird Helix 7 keeps me out of trouble.
Minn Kota Edge keeps me where the fish are. I am very pleased with boat and Brooks Marine. I enjoy Xpress all the way around! Robert R. This boats does it all. I would not change a thing. I purchased it at Boats Unlimited in Baton Rouge, which was a great experience. The ride is great. The lights in all compartments are very useful. I was fishing with a friend on the same area of water and we were dry and they were soaking wet. Glad I had my Xpress! Keep up the great work!
Steven G. I use it as mainly a hunting and fishing rig and luckily got to hunt in it around 35 different days this year for duck season. I hunt out of my boat a lot during duck season and the number one feature that I love about the DBX is the amount of room and inside the boat. The openness allows for maximum comfort when hunting out of the boat, I can easily hunt 3 people in the boat and not be crowded at all. Another this I love about the boat is how well it handles rough water for its size.
It cuts through rough waves very well and is super stable and comfortable on the water. Finally the durability and strength of an Xpress is second to none.
Bumping trees going through the timber, pulling up on gravel, sandbars, or even concrete, nothing damages this boat. The boat still looks brand new even after a season in the Arkansas timber. I purchased my package from Rothwell Marine in Hope, Arkansas.
The made the process so easy, I called and told them the combination I wanted and they handled it from there. It was my first boat purchase and it was very smooth thanks to the people at Rothwell Marine. Haydn S. The three features that I like most on it is the versatility between small river and large lakes, the quality of manufacture with very good aluminum and durability over time without major maintenance. This is my first Xpress Boat and I love it! Cedric L.
Even for a skiff, this bad boy handles chop just fine and rides like a Bentley on everything else. Second is getting skinny. Just yesterday I had this boat floating about as skinny as the trolling motor prop. It glided right over the mud flat easy as pie. Third is the platform. Next is stability. This thing is insanely stable. Two people can walk around to opposite sides of the boat stand on the gunnels or even stand on the same gunnel and this boat barely flinches.
Hardly any noticable tilt while moving around the boat. It just stays nice and flat which definitely makes fishing with multiple people much more comfortable. I love the way the SeaDeck feels, cleans up, and looks. The guys were great and super helpful even though none of them had direct experience with this particular boat.
Robbie and Heath were great with the purchasing process and Morgan Mo in the shop did a great job with the rigging and checking to make sure everything was perfect before pick up. I was looking for several things on my next new boat purchase� high performance was tops on my list of demands. Next was a boat without carpet.
I chose the SeaDek flooring with extreme coat lining and love it. Last but not least was the price. With Xpress you get more bang for the buck. After all the added options, my final price was much less than any comparable brand.
A couple of phone calls and a week later, I made a six hour ride to pick it up. The salesman was great to work with and made the whole process quick and easy. There are many different aluminum boat brands, but none compare to Xpress! David D. I noticed something a little different that suited my style of fishing. As time passed I forgot about that experience and got another glass boat. Afraid to go where I wanted to go on the water and the fact I could simply not get this boat into some areas I wanted, the search began for something different.
My wife and I went to a boat show and she said this is what you need, in front of me sat the X21 Pro, then the memory came back to me from Guntersville. I saw an Xpress in a spot I always wanted to fish but could and would not try to put the glass boat into. I said something to a friend and he told me to contact Dale Hightower who runs an Xpress X21 on the Bassmaster Elite series.
Dale and I met and went out on a local lake. Originally, I wanted something to get really shallow and around rocks, timber etc. What I got was a whole lot more. For me, the X21 surpasses every boat I have had, in every category. I run a family-friendly guide service and specialize in spoonbill from November until the end of February the rest of the year I chase crappie, white bass and hybrids. I chose Xpress Boats because of the great storage features they have on the boat compared to other aluminum boat brands.
I like the durable finish and cool touch feature of the extreme coat in the summertime. My H20Bay services up to five fishermen comfortably on a guided trip. I also like the bait well built into the front of the center console and rear livewell. I also love freshwater bass fishing in the spring time!
The top features I love the most on my Xplorer Bass Series is the stability of the boat. I have two boys under three and the way this boat floats is awesome. Second is the storage. My last boat War Eagle had no storage, so there was clutter with tackle and other things we brought in the boat for the day that would get in the way. There is so much storage on the boat that it looks like I brought nothing out for a full day of fishing and family fun.
The third thing Build Your Own Boat Dude Perfect Guitar I love is the standing space. The boat is super sturdy and well built! Last thing is the bench seat, which is very comfortable and a much better option than the 2 seat setup. Excellent boat all around that hits all the check marks. The truss rod slot is routed about 5 mm deeper so that a strip of basswood can be added onto it and the metal does not push directly against the fragile and precise fingerboard.
Note : in the book they said explicitly NOT to try and make the truss rod slot by hand but use a router instead. After having done it by hand, I can tell you they're in the right : my work on this part was passable at best, and the fit is not quite as good as it should be. Use a router if you can! I chose some contrasting veneers to sandwich between the neck and the head plate, which is the same cherry as the sides and back.
I cut the head shape on the scroll saw, but ended up changing the design way later on. This can easily be done by hand with a coping saw! With a dovetail saw, I cut the rough shape of the shaft of the neck and, very precisely, the tenon which will attach the neck to the body.
The pictures are annotated. First, a primary and secondary facets are established with a plane and chisel respectively, then the shape is refined with a rasp, card scrapers, a kukri knife and finally sandpaper. I didn't really get creative with the shape but sculpting is really enjoyable as it is quite different form the kind of woodworking I usually do, square angles and all that.
This feels almost artistic! This one is made out of ebony, which is hard and not sensitive to moisture change, a very determining factor in whether the guitar will keep proper intonation throughout its life. The spacing of the frets has to be as precise as you can make it. It depends on the length on your scale the distance between the nut and saddle and is tabulated.
Without going into music theory, it is a separation of the whole musical spectrum of each strings into "pleasing" intervals, defined by Pythagoras back in the old days pepperidge farm remembers.
Using a scoring knife, I marked the fret intervals then cut the slots with a dovetail saw guided by my best square. Because of it's crucial geometric properties and position compared to the nut, the soundboard must not move during glue-up. It's hard to stress this enough. Then, using a tiiiiny drill bit I drilled two pin holes in the fret slots and used two drill bits of the same size as a perfectly matched pin.
You'll get those back don't worry :. Then I made a clamping caul with chamfered holes in order to accomodate the pins, and glued the fingerboard down with white glue. This is one of the 3 most critical glue joints of the guitar, along with the neck scarf joint, and the bridge joint. If this joint is not perfectly tight, the soundboard could simply break in half under string tension. First, the two book matched halves of the soundboard have to be jointed together.
Adjust the plane so it takes only a minimal amount of wood out on each pass see pic and once you get a continuous shaving along the length, check the two halves together against a source of light such as a window, which will allow you to assess the continuity of the joint. We want no visible light shining through! Once a good joint is reached, it's time to glue! For this, I made a simple setup in which the two halves are flat on the bench and wedgy cauls are gently hammered from the side to clamp everything together.
Note: Use paper underneath the joint so the soundboard does not get glued to the bench! This is the kind of mistake that generally happens only once ;. Now, we need to bring the soundboard and back to an almost final thickness, all the way from the rough lumber dimensions.
The wood was about 5 mm thick, and is brought for the sound board at 2. There is a lot of different guidelines on what the thickness of the soundboard should be with regard to sound and structure. The main principle, as for many other aspects of guitar building but more so in this step, is that we want to remove as much wood as possible, so that the string vibrations make air vibrate sound! Too thick a soundboard will deafen the sound. However, to avoid frustration as this was my first guitar, I erred on the safe side!
The next one will be thinner : Thickness of the back is of lesser importance as it is subject to less stress and not as important for sound. The thicknessing was all done by hand! Thickness planers are not an option here, as they would destroy such thins pieces of wood. Professionals use drum sanders but I did not have one of those. Eventually, what seemed a daunting task ended up being one of the most reflective aspects of the project.
Doing it by hand allowed me to feel the wood in a way that a machine wouldn't and I learned to work a bit more with the wood rather than against it.
Here's how it was done, after one side was sanded down to grit and was facing down on the bench:. And repeat all of this until the desired thickness is reached, then smooth the whole thing down following the grain with a card scraper.
Note: Do only one pass at a time! I used a toothed plane blade, which allowed me to see where I had been and not go over that area again, which is crucial to retain homogeneous thickness all over the work piece. This was the first of a couple of nerve-wrecking steps for me, but in hindsight it went juuuust fine and I guess I shouldn't have worried about it that much!
Here we use a router to and 1 remove material from the soundboard in order to accommodate the rosette inlay and 2 make the sound hole. The middle of the sound hole is marked and drilled to fit in a metal pin made from a nail. Then, a new base for the router is made with clear acrylic, in which two holes are drilled in which the pin will fit tightly, and the distance of which to the center of the router bit was calculated so that the router is drawing a circle of exactly our dimensions of interest see pics!
I chose some burly veneer for the inlay because I liked the way it looked. Traditionally, mother of pearl is used for acoustic guitars but I wanted the first one to be a very down-to-earth, unpretentious guitar as I had no idea how it would sound. The inlay is cut on the scroll saw and glued in place, highlighted on the side with red and black ebony veneer strips.
The voicing of the guitar is where the difference between a wooden box and a musical instrument happens. Here are some videos on how to brace and voice a soundboard. The idea is to add bracings to the soundboard so that it becomes stronger. The wood of choice for this is quartersawn, split billets of spruce. Bracing patterns are well established and vary depending on the luthier, the model of guitar, type of strings etc.
The braces are glued and material is removed from them with a chisel in what is likely the most defining step apart from guitar model and wood choice in what the guitar will sound like. I am no luthier. This is one of those times in this project where the knowledge is not at all that of the woodworker and belongs to a whole other world, that of musicians and luthiers and I am not in this world. Hence I will say little and refer you to better authorities in this domain.
Here's what I can say though:. Again the idea here is to maintain structural integrity with as little wood as possible. However, we are using one more sense here: our hearing! The soundboard is "tapped": hold it with two fingers near the waist and lightly tap with a finger, holding it close to your ear and note the sound it makes. The tapping is done before bracing, after adding the braces and again as they are thinned down.
Before bracing, you should hear a full sound with a lot of harmonics, which will be reduced considerably, especially in the bass side, when the soundboard is braced as it becomes much stiffer and should come back to some extend as the braces are shaved down. Do not shave them down too much, at the risk of mechanical failure!
Again, I erred on the safe side here and left the braces probably much rougher, or bulky, than I could have. A hard wood bridge patch of 3 mm thickness is also added, which will strengthen the soundboard in the crucial spot where the bridge is glued and string tension is the strongest, and where the bridge pin hole are drilled. The x-brace see pics for nomenclature is reinforced at the joint with strips of fabric soaked in yellow wood glue.
There are not many pictures of this step as the whole process was both stressful and time-sensitive, but I will walk you through it! First, they are thinned down in the same way as the soundboard and back, with the hand plane. The idea is that by applying heat to the moist wood, water vapor will form within the thickness of the wood and make it plastic rather than elastic, which to say that rather than spring back after being deformed it will rather retain the deformation.
Then, when cooled down, the wood will remain "stuck" in the shape given to it while it was hot. The wood has to remain wet throughout the bending or it might break or turn to coal. I simply kept dipping the wood in water as I went. This step was stressful, but incredible.
This is as close as you can get to working wood with your own hands, no tools in the way! You actually feel what is happening in the wood, in your hands, and in your nose as you smell the hot aromas come out.
The cherry I used, when heated, smelled of hot applesauce and flowers. It was truly incredible. When you set the wood onto the bending iron and add a bit of pressure, you soon feel it give way under your hands and throughout the process you get a better understanding of when you can bend and when it would break. Start with the wide angles and finish with the waist, which is much more tricky. After each bend, let the wood cool down in air so it doesn't spring back to its natural flat shape!
The whole process took about 4 hours for me, the time to learn what was happening and how to respond to the various feedback and gain confidence. A graft of spruce is added all along the back joint and is chiseled away where the horizontal braces will stand. We are going back briefly to the neck in this step, and installing frets!
Fretting is a precise step, in which we have to make sure that all the frets are level, crowned and dressed flat in regard to each other, and not flat at the top but rather in the shape of a dome and that they are not presenting any burr on the side that would harm the player's fingers. My notes are that you should spend a lot of time on this and do it properly.
I didn't at first, thinking it was not too big a deal I wanted to play the guitaaaaaaar , and ended up with a lot of buzzing. I went back to it and did it properly, the difference is incredible in playability and sound.
Don't skip this! From an ebony blank, the bridge is drawn and the pin locations as well as saddle slots are precisely marked use the scale plan of the guitar provided above. The pins holes are marked with an awl and drilled and the saddle slot is routed out with a well guided router.
Then the shape of the bridge is cut out with saws and chisels and it is sanded to grit. Kerfed linings are made from basswood and glued onto the sides, where they will be glued to the soundboard. The sides are then glued to the soundboard, along with the neck mortise and bottom end block. The kerfed linings are chiseled away to accommodate the bracing of the soundboard, which abuts the sides. Using a flexible piece of wood or cardboard, a straight line is drawn from the waist to the neck mortise.
Then, the sides are trimmed along that line with a jack plane.
|
2nd Standard Cbse Hindi Book Generator Build Your Own Mirror Dinghy Questions |

23.04.2021 at 11:27:48 Limited warranty provided really absolute cause.
23.04.2021 at 22:17:27 Sense to have cheating boyfriend portable pond.
23.04.2021 at 20:52:52 Listings, jetski classifieds, motor boats, power boats the plans.
23.04.2021 at 18:24:46 Know about upcoming events, classes aluminium cabin boat aluminum boat trailer aluminium boat 16ft.
23.04.2021 at 15:40:50 Game available on the site are not only browse.