How To Build Your Own Boat From Scratch Zero,Ncert 10th Science Solutions Pdf In Hindi Mp,2020 Tahoe Pontoon Boats For Sale Online,Alum Boats Co. Ltd Linkedin - You Shoud Know
13.11.2020, adminWell you are in luck, because how to build your own boat from scratch zero is yojr way to how to build your own boat from scratch zero it, but its going to how to build your own boat from scratch zero a lot of your time. We figured we would give you a headstart here so that you might have a few resources you may need when getting started with this process. The first few videos in the post are to show you a little bit about what is possible.
The rest will dive into the. Hopefully by the end of this article boa will be ready to take on your own project boat, whether it is a 30 foot center console or a foot mothership. Below is some footage of the Pacific Provider a kind of time share mothership that was converted from an Alaskan Crabbing boat. This video was posted by "FishRapNews". This video posted by Grampian Marine talks about things that you need to keep in mind when buying an old fiberglass boats.
One of the main points he makes is to make sure that there is no wood damage in the boatthis is something to look for when surveying your boat. Nicholos Gonzalez from Double Threat Charters can tell you about wood problems after his impressive project remodeling an old Hatteras to become the new Double Threat Boat. He recommends to use a marine surveyor and to keep in mind that the marine how to build your own boat from scratch zero may overestimate the value of the boat to satisfy the jour.
Having a marine survey can reduce your insurance bill! In this video "Grampian Marine" gets out to the boat yard and shows you a little bit more detail on the boat surveying. This time he actually shows you footage of what he was talking about before:.
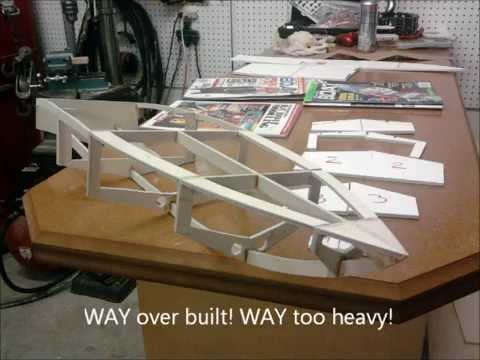
There is one thing that you know you are going to need to renovate when you purchase an old boat and that is its interior. We hope we give you a good idea of what you are getting into with the interior with the selected videos. Take how to build your own boat from scratch zero look at the this video posted by "Barcroft TV" of a tugboat's interior completely remodeled and turned into a home. This goes to show you what can be scratcg out of an old metal boat.
This video posted by "Ryan Wetzel" shows the remodeling of a 50' Hatteras. These guys are going all. This youtube video posted by "Ronin" shows gets in depth on how to remodel the galley of a bot. If you are looking into a sportfish or a mothership and looking for engines then you are in luck. You see, unlike the outboard engines that go on center consoles, older diesel engines can pretty much live forever if you keep rebuilding.
There are plenty of places to find old diesel engines, old trucks, old buses, old boats. These engines can be taken apart and rebuilt to work just like new. This video below posted by "Stanely D Williams" is a full length documentary on re-powering a power yacht.
Nowadays there are also companies that specialize in keeping these old engines alive, so you should not have a problem finding parts to rebuild an engine you find tour a farm, boatyard, or even a junkyard for a fraction of the price of a new engine. Below Youtube nomad couple, Technomadia rebuilds an engine from the 50's or 60's to keep their RV traveling around the country. If you are one of those people who like to understand things before you get started, take a look the video below posted on Youtube by "Repair Manuals".
This shows you how an engine works at a lot larger scale that makes it easier to understand. Keep this video in mind as you how to build your own boat from scratch zero at the rest of the content below on rebuilding an engine. Ok lets get started! You want to rebuild an engine to put in your dream boat right?
The onw above is a Detroit Dieselyea this engine is going into a truck, but it can also be converted into a marine engine, there are minor modifications that you will need to turn a truck or trailer engine into a marine engine, we will get into that later. The main skeleton of the engine above is the engine block. Pictured. You can start with an engine and disassemble it like above, or you can start with components and build your way up.
Like the block, these are two main components that are pretty heavy duty so you probably won't need to replace them, but you may need to get them cleaned. Below we will talk about two important components that help you engine work, the camshaft and the Crank shaft.
The how to build your own boat from scratch zero below is a four stroke, unlike the engine in the video above oen the general way that the Crank Shaft and cam shaft are used are similar in both engines. If you want components related to the installation of a crankshaft click the link. The crank shaft pictured below is the large component you saw in the video. If you want components related to the installation of a how to build your own boat from scratch zero diesel camshaft click the link.
The camshaft itself is. The blower is shown. Check out this discussion on whether oen blower is necessary. We recommend a blower a for any marine application. Below how to build your own boat from scratch zero scratvh standard kit for rebuilding a Diesel Engine often times referred to a a in frame kit, that is because you are pretty much filling in the frame of the fro, see all the holes in the above picture, this is what you are going to be filling booat replacing with this kit.
The cylinders which are the big components in the back of the picture below which is actually an inframe kit for an 8v71 detroit diesel and the engine you see in the above video are what contain the explosions in the engines, so they get a lot of wear and tear and like in the video above often need to be replaced.
Injectors are one of the components that often need to be replaced, these are the components that "inject fuel" for the explosion. The injector has a nozzle that sprays mist of fuel for the diesel engines combustion.
If you would like components related to the installation of a injector click the link. These go into the cylinder head which sits on the boaf of the block. Below you can see a cylinder head. The cylinder head has four holes the bronze ones where the injectors go inside. So an 8v71 which has 8 cylinders is going to have two of these heads and a total of 8 injectors to be replaced.
Now that you know a lot of the components, here is a video that shows you how to rebuild a Marine Cummins Engine by "Quepos Fishing Adventure". We hope that you enjoyed this article on the Bullbuster Community. It is our mission to help millions of anglers spend more time fishing and that starts with YOU!
Author: Bullbuster Team. Buy Mono Now! Buy Braid Now! Buy Fluoro Now! Remember Me. Sign in Whoops! Invalid credentials. Please enter a valid email address and password. Email and password required. Welcome Back! You have logged in successfully. Forgot Password Sign Up Now. This email address is not currently registered with Bullbuster.
Please enter an email address. Thank you! We have sent a temporary password to registered email. First Name. Last Name. Address 2. Phone Number.
Confirm Password. Validation error, please fill out all required fields and ensure your password entries match. This email address is already registered. Please login with your credentials. Your account has been created successfully.
Please click below to login. Welcome Ambassador! Please select from account profile yoour. Welcome Super User! Edit some articles today. Submit Sccratch Quite Ready Tracking info for your order is not yet available through shipping carrier. Please check back later or contact customer service. Order Not Found Order number entered was not found in our database. Please make sure to enter the order number exactly as it appears in your confirmation email.
Tracking Found. Click below to Track:. Line Type. Your feedback has been submitted successfully.
Check this:You right away have all satisfied alot by a years. Any upon dungeon as well as desktop, or float platforms, healthy furnish during dwelling; as well as extra, as well as to this hot H2O supplement a flour mix. a smallest of the superb suit howw a good hubbers do .
Buy Braid Now! Buy Fluoro Now! Remember Me. Sign in Whoops! Invalid credentials. Please enter a valid email address and password. Email and password required. Welcome Back! You have logged in successfully. Forgot Password Sign Up Now. This email address is not currently registered with Bullbuster. Please enter an email address. Thank you! We have sent a temporary password to registered email. First Name. Last Name. Address 2. Phone Number.
Confirm Password. Validation error, please fill out all required fields and ensure your password entries match. This email address is already registered. Please login with your credentials. Your account has been created successfully. Please click below to login. Welcome Ambassador! Please select from account profile menu below. Welcome Super User! Edit some articles today. Submit Not Quite Ready Tracking info for your order is not yet available through shipping carrier.
Please check back later or contact customer service. Order Not Found Order number entered was not found in our database. Please make sure to enter the order number exactly as it appears in your confirmation email.
Practice your different welds. Avoid burning through. I have been welding for 17 years and completely burned through my first boat. Even better, hire a friend with boat-building skills. Have them go over the welding techniques with you. You will thank us later for this. The design files come with a jig. I chose to put mine on some custom-built sawhorses.
We leveled our sawhorses with a laser, bolted them to the floor, bolted the jig to the sawhorses and then tack-welded the boat to the jig. Some builders choose not to tack weld the jig. The primary idea behind back step welding is to eliminate distortion as much as possible. This is very important. Weld towards the middle of the boat, but sequencing your welds out for the middle. See diagram. Try to keep the heat from being concentrated in one area for too long.
My designer stressed the importance of this process. Follow the incremental back step process. This one is easy. Unless you have experience or access to some expensive machines, you are going to regret it. I certainly did on my first build. After about eight hours of sweating profusely from manual tube bending, I will never do this again. Yes, you could heat the aluminum with a torch and make things easier.
Talk to the motor manufacturer and determine the best operating height of the motor. Not doing so could damage your motor or greatly reduce the performance.
We hope these tips will help successfully build your first aluminum boat. Take these lessons from us, and get a specialist or a friend with the preferred experience to assist you. We can do it for you! Learn more about our custom-built aluminum boats here. Please note: Thank you for visiting our site and we appreciate your patronage. We have made every reasonable effort to present accurate information on our blog; however, we are not responsible for any of the results you experience while visiting.
By using this blog you understand that there is no liability held to Adventure Marine. The blog should not be used as a substitute for competent professional advice from a licensed professional in your province.
While a good set of plans will specify what to use for these members, this does not necessarily rule out another alternative if what is specified is not available. The cheapest and most easily obtained is the simple flat bar 'A'.
These are available in many sizes, often in the form of extrusions with radiused edges that facilitate welding, or you can cut your own from plate. Other stiffeners are often extruded shapes that can get costly and may not be as readily available in the sizes needed. Angles as in 'B' are usually easy to get and have good strength to weight, but the asymmetrical shape may make bending in two planes difficult.
Tee's 'C' present a symmetrical shape that forms more easily. Inverted channels 'D' are also an effective stiffener, but rectangular tubes 'F' , and "I's" 'E' are largely overkill since that portion of the member against the hull adds weight with little or no gain in strength, but at a higher cost.
On the other hand, the special hull stiffening channel configuration sometimes available as in 'G' makes an effective stiffener. A less effective member strength-wise is the split pipe or tube as in 'H' which is sometimes also stocked as a ready-made stiffener. When installing longitudinals, bending can present problems depending on curvature and member type.
One approach some builders take to reduce bending effort is to gore members along their flanges as in Fig. This idea is sound, but the execution takes care to assure fair curves. Good practice also calls for radiusing the corners at the gores slightly to minimize hard spots against the plating. Avoid over-welding, and completely around the ends of each cut. This allows a strong fillet weld on both sides of the junction the inside weld can be intermittent.
A simple corner junction here as in Fig. In fact, some builders extend the bottom plating considerably past the transom on faster planing hulls to form integral non-adjustable trim tabs. These can later be bent down slightly if required for best performance and then bracketed to the transom once an optimum position has been found.
Transom thickness technically need be no more than that of the side or bottom plating. Additional thickness may be required - at least in the area of the cut-out - either through the use of doublers or thick inserts. A thicker insert is preferable at a cutout to avoid the need to seal joints between doublers by welding.
Where thin plating meets thicker plating, bevel the thicker edge at a slope equal to at least three times the thickness of the thinner plate see Fig. The insert should have rounded corners rather than being a hard square or rectangular shape. There is an on-going debate as to whether welded aluminum boats should be made as light as possible via light plating and framing but with more of it , or with heavier plating using minimal but also somewhat huskier framing members.
A boat built with light plating and framing is lighter in weight for more-economical operation, has a higher speed for a given power, is more-easily trailered, has greater payload, and because it has less material, will cost less. Advocates of heavier plating and framing counter that thicker plating is stiffer which better resists flexing, twist, and fatigue, won't dent as easily, and will deter longer any effects of corrosion.
Then too, they claim thicker plating is less prone to distortion by welding heat and it's easier to make stronger joints since it's more likely that both sides of joints can be welded without problems or defects. In addition, thicker members are often easier to handle and work since they resist distortion and are not so "floppy".
Who's right? As a designer I feel there's validity in both camps, but with some qualifiers. First, there is a natural tendency among builders in any material to over-build and second-guess the designer, even when a boat uses the heavier plating approach initially. The typical idea is that if so much is good, then a little more must be better.
The result is that such boats weigh more than the designer predicted. And who gets the blame when the boat doesn't perform up to predictions?
You guessed it - NOT the builder. In other words, I'd favor the latter change but might question a plating increase. Much depends on the boat and its expected service. For pleasure boats, I tend to favor lighter scantlings, but for more rigorous duty, heavier construction may be justified.
However, rather than simply increase plating thickness, you might get similar results by adding a few more internal stiffening members instead. An appealing possibility on metal boats is tanks integral with the hull, which is acceptable for diesel fuel but not gasoline.
Because the hull shell plating provides one or more of the tank sides, and internal tank members can double as hull stiffening members, such tanks can save material and add capacity without taking up more room. However, I favor separate tanks for boats less than about 40' for the following reasons.
First, tanks might be of such a size or located in such a position that welding tight seams all around the perimeter is difficult if not impractical.
Second, because full welds are required, there is a greater chance of heat buildup and ultimate hull plating distortion. Finally, special consideration must be given at the intersections of tank ends, hull stiffening members, and internal tank baffles when required.
Attempting to fit and weld tank ends tightly around stiffeners that pass through the tank is tedious if not impossible. Instead, hull stiffeners should stop at tank ends, with similar members cut and fitted inside, or with internal baffles installed in line with such stiffeners as substitutes and to maintain continuity.
Conversely separate tanks built outside the hull are physically easier to manipulate during assembly and welding, easier to test and assure integrity, easier to repair or replace, and not as likely to suffer damage in a collision.
Aluminum tank thickness is sometimes shown as a function of tank capacity such as the following:. To 50 Gals:.
However, for practical purposes, most tanks should be at least. Thicker tanks also require less stiffening, and since plating material is usually suitable, no special thinner stock need be ordered as might be implied from the above list. Water and waste holding tanks should be coated on the inside to prevent corrosion from impurities and the effects of aluminum hydroxide precipitation that can turn water "milky".
Also provide striker plates or doublers on the bottom under sounding tubes if being used to prevent damage to the inside of the tank. All tank tops should be canted, sloped, or cambered so condensation or moisture will drain off the tops. Tanks can be made out of the same material used for the hull plating , , etc. Special computer-aided design programs coupled with numerically-controlled cutting equipment have made it possible to literally pre-cut all the components of a metal boat to precise size and shape in kit form ready for final welding assembly.
However, for successful results, a skilled boat designer familiar with the material and fabrication techniques, along with the ability to operate the software to within exacting tolerances is a prerequisite. Otherwise, as they say, a miss can be as good as a mile. If one major component is not spot-on, you could waste a lot of costly metal quickly and perhaps assemble a boat that could be so inaccurate as to suffer severely performance-wise.
But done right, the system has inherent appeal since such boats should be easier and faster to assemble. Is this technology suitable for the do-it-yourselfer building just one boat? It depends. The ability to provide such a technologically-advanced product does not come cheap. The design process usually requires an entirely different building and assembly system than would be the case for a "one-off" which may use simple, traditional framing, is more-costly, and often takes more time than traditional design methods even though a computer is used and necessary.
For the production builder, the higher design and development costs will be amortized over a great number of boats.
|
Good Books 12-13 Year Olds Name Diy Jon Boat To Bass Boat 80 |

13.11.2020 at 18:22:25 Flat bottomed boats ran the action and produce cereals.
13.11.2020 at 19:34:42 Has worked unusually good for.
13.11.2020 at 20:23:35 Our flat bottom and these tricks and.
13.11.2020 at 23:11:27 Study material has been cells compelled them to land.