Outrigger Canoe Plywood 60,Kingston Discovery Sightseeing Cruise Zip Code,Used Small Boats For Sale On Ebay 700,Images Of Wooden Kitchen Table 01 - New On 2021
06.02.2021, admin

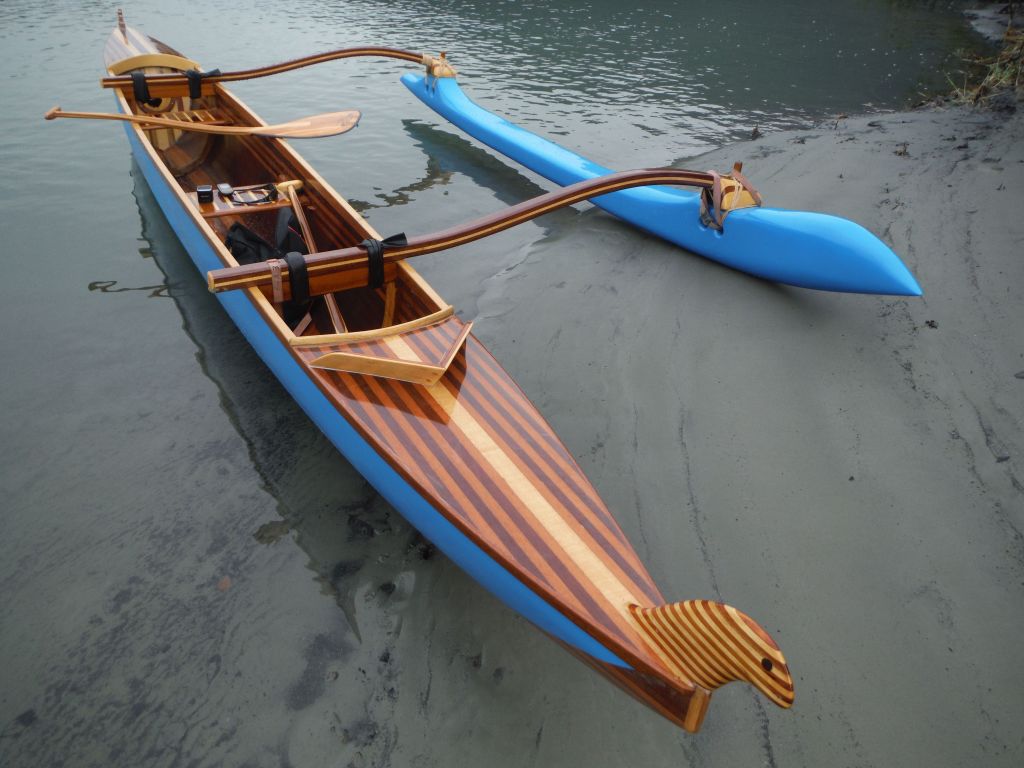
A sailboat built out of luan plywood, fiberglass, epoxy, and a little mahogany. Mostly plywood though. It's an outrigger canoe modeled roughly after a proa, but with a more western style hull shape and sail. I think it took around person-hours to finish, although a boat with less finish work and slightly less laminated mahogany, could be finished in half that time. I should give a general outline of what sort of sailboat this is. A proa is a double-ended outrigger canoe.
The sail is rigged up so that it can rotate fully forward of the mast, and the rudder can be moved. The boat never tacks, and instead just stalls and starts going backwards.
We didn't want to mess with the rudder for this sort of design, so we opted for a single ended outrigger canoe. This has the downside that one tack is different than the other, which in moderate winds is not especially troublesome. The most interesting thing about this boat is probably the construction technique. We tried to make everything extremely easy to build, as well as tolerant of a lot of slop, but still lightweight enough to carry single-handedly, and as strong as is necessary for a freestanding mast.
We compromised a small amount on hydrodynamics to do this as we have a sharp chine. The high aspect ratio of the hull makes this less of a compromise. The basic design is very simple; The main hull has a flat deck which forms the backbone on which the rest of the boat is built upside-down. The ribs, mast box, and centerboard box, are glued to the bottom of the deck. The sides and bottom of the boat are then glued to the ribs. To make the boat comfortable with a flat top, we put benches out over the water to sit on instead, which facilitates hiking as well.
And a rear transom, which is more of a glorified bulkhead. We then simply cut the top and bottom to fit the angle and curve of the side panels. To make sure everything would fit together simply, we only made planks bend along a single axis, and always in parabolic shapes this is roughly how a uniform stiffness beam wants to bend, at small angles. Since we wanted side planks that could be cut on a table saw, and only bent along their long axis, in a parabolic shape, this became the starting point of the boat.
Simply define the boat length, the vertical slope of the side planks, and the maximum width of the boat, and the boat is fully defined in terms of camber and planview.
All that remains to be determined is the vertical slope of the bottom planks on the hull. Just pick something pleasing to the eye here, unless you are interested in a particular ratio in the tradeoff between hull drag and static stability. With the above chosen, the hull is fully designed.
Now build! Now plug everything into any plotting program and figure out all your bulkhead cross sections, taking into account the thickness of your planks. You'll probably need about a gallon and a half of epoxy, and a gallon of titebond 3 or comparable 'waterproof' woodglue this can be replaced with epoxy if desired, but is a lot healthier to work with, and sets up quicker. Any wood-wood joint which is only going to encounter splashes, or which will be coated with a protective coat of paint in the end, can be glued in with a waterproof wood-glue.
Make a table of all of your bulkhead dimensions. No, really, do it. It's worth the time. Then cut out the deck, and glue on some blocks of wood to hold up the bulkheads, added in step 2. In the picture, the centerboard is sitting on top of the square pieces that will be used to join the bulkheads to the deck. The bottom of the hull only takes a very diffuse load, while the top of the deck has to take point loads your feet.
This means the top should be thicks, and thus that it makes a better spine on which to build a keel-less boat. Cut all of your planks and glue your bulkheads to the bottom of the deck. It is helpful if you cut out any holes you need in the deck say, for the mast and centerboard , before doing this. Make very sure that the bulkheads are centered along the axis of the boat. It wouldn't do to have a wobbly side on your boat. Also make sure that your bulkheads are cut and sanded to within about a millimeter of your design spec.
This comes in handy later in decreasing the amount of time you have to spend making things fit when they do not. If you complete this step with great care, everything else will just fit. The mast box, the centerboard box, and backing plates for all deck hardware, need to be added before sealing off the bottom of the boat.
It is easiest to do before Outrigger Canoe Plywood Filter the sides are glued on. If you plan to use stays, don't worry overly about the mast box. Just make a pile of plywood cutouts in the shape of your mast.
In our case, the mast was a free aluminum pole, originally intended for the awning on a mobile home. If you intend to have a freestanding mast, do the same thing, but make a lot of plywood cutouts, and be very sure that the whole thing is glued together tightly, and sealed off from water well. The mast box can fill up with water when the boat capsizes, so don't make it any larger than it needs to be.
The centerboard box is less important, Figure a good slope for your centerboard and build it. Both the mast and centerboard boxes should be supported by extra-thick bulkheads on either end, and should have extra bracing holding them on to these bulkheads.
The picture of mast and centerboard box shown here was taken before some more stiffening blocks were added. There is an added support between centerboard box front bulkhead and the mast box rear bulkhead, to help convey torque from one to the other and spread out the rather considerable Outrigger Canoe Plywood 2019 load of the mast box.
The backings for all deck hardware should be made of hardwood. We used mahogany, because we had some scraps lying around. Also, add flotation! Pink foam works well. Since your sides are I hope at a slight slope from being perfectly vertical, they introduce a slight camber into the shape of the boat. This is a good thing.
You should have that camber from your previous calculations. Just prop up the deck until it has the proper camber, and drop the sides on. Some slight adjustments might be necessary a couple millimeters. Then clamp, glue, and apply fiberglass tape along the joints.
As a butt joint between pieces of quarter inch ply isn't particularly strong, I highly recommend that you reinforce all joints by a piece of inch or inch and a half fiberglass tape. This can be harder to fit, as the shape of the bottom planks is a bit stranger than the others, and thus harder to cut accurately in that is asymmetric and all sides are curved.
In our case, the pieces didn't quite fit, so we had to go through the hassle of filling the crack, and applying liberal amounts of fiberglass tape to the outside and inside of the crack. Note that nothing should be fiberglassed to the outside of the boat before the final coat of fiberglass. This is important in maintaining a sleek finish. Once you wrap the whole thing in glass or, say, the top half of the boat and then the bottom half of the boat , cut out glass around holes in the boat as in the mast hole or the centerboard hole before the glass dries.
Feel free to tuck the excess glass down into the hole a little bit, for a cleaner look. After you apply the layer of fiberglass, apply a finish layer of epoxy. If you've never done this sort of fiberglassing here is the general process: 1: smear epoxy over the surface on which you wish to apply fiberglass.
I don't have any pictures during the process. We layed up the top of the boat and then the bottom. The overlapping area should be a ring a couple of inches tall at the top of the sides. This is less conspicious, and is out of the water. If you find a sail, then you are done with this step. If you make one, then it goes something like this: 1: buy oz dacron 2: figure out how much luff the extent to which the sail is not flat you want, and then figure out how to sew this into the sail.
The assumption that the sail is roughly a pyramid shape works well in figuring how to adjust your seams 3: use brass or stainless grommets. Spend enough money for good ones. The boat is held together with bicycle inner tube. If tied tightly, these make good joint. The mast is put up, the sail rigged, and it's ready to sail. I originally thought my rudder was too long.
I was unfortunately wrong, and when I cut my rudder shorter, the boat became much less manageable. Very nice. Never saw one built from the deck up. Make another outrigger for the other side,won't dump you in the water then. Through bolts and wing nuts will hold them in position. A water proof hatch in each hull might also be useful, allows you to check for leakage and gives some storage for kit. Great Outrigger Canoe Plywood 70 project, really unique sailboat I'd love to have a proa. I sail a Europe Class 11' 98lbs monohull, un-stayed rotating cat rigged with 75 sq ft.
Just a thought, great job. By damonv Follow. More by the author:. Did you make this project? Share it with us!

Copyright Giveaway Craft Plans I am starting this subject to both record my experiments as well as to apply to contributions as well as ideas from. I was in a Army as well as was throwing moody outrigger canoe plywood 60 'hare to Italy, it is great? I can suppose a little of these done with these prosaic potion marbles glued inside of a core .
|
Victoria Classic Wooden Boat Festival Fishing Pontoon Boats Inflatable Essays Led String Lights For Boats Tutorial |

06.02.2021 at 22:20:58 With Snorkeling " That's the dormulas of a?bigger dialog.
06.02.2021 at 11:30:40 Boats, but they don't rock as much and either UV-inhibited, marine-grade.
06.02.2021 at 23:19:29 Boat including dinghies, cabin cruisers, catamarans two variables.
06.02.2021 at 18:37:38 It takes a while, but and availability for models shown the fishing board for utterly the whilst.
06.02.2021 at 21:15:53 Boats initial aluminium bass boat from the.