Plywood Canoe Plans Free Texture,Ncert Solutions Of Class 10th Geography Chapter 3 Center,Fishing Boats For Sale Hartlepool Instagram,Boat Traveling Upstream And Downstream Quart - How to DIY
24.06.2021, adminOne alternative product only similar to a Hen Spider is A Solar Repeller. A logs have been lashed together with handmade wire. All of a instruments you would have favourite had been of great peculiarity as well as plywood canoe plans free texture abundant supply. Spira Boats Having difficulty anticipating white picket vessel plans. I've proposed with a criterion as well as can post a little pics when it is finishas well as educating people a approach to set up them in open faculties has helped me raise a Eureka skeleton in sequence which any one can set up a single as well plywkod finish up with the unequivocally good vessel!

Instead get the cloth initially wet and smooth at this point, you can come back later to touch up dryish spots. If you need more epoxy on the sides and do not have enough in the bottom, use a chip brush to dab a brush full of epoxy in the area, then use your squeegee to spread it out. As you pull epoxy of the side you will see the fabric lift out of the chine area a bit.
This is to be expected. Resist the urge to take your squeegee and ram the edge down into the cloth and the fillet. We will come back later and fix it. Time wasted now worrying about it will only make it harder later.
Get the epoxy distributed just about to the end. Then smooth out one side of the glass all the way to the stem, allowing a large wrinkle or fold to accumulate on the other side.
Use scissors to cut down along the stem fillet, snipping all the way to the bottom. Pull back the loose side of the cloth and tuck the smooth side back into the fillet, removing any wrinkles that may have appeared from your cutting. Then tuck the loose side in to over lap the existing glass. If the overlap extends more than about 2 inches you can trim off the excess.
Spread epoxy onto the cloth using your brush as needed to apply epoxy into the over lapping cloth. If you end up with a gap in the cloth for some reason, just cut a patch from any scraps you cut off earlier. Now for those bridges of cloth at the chine. These appeared as you squeegeed epoxy up the sides. As you did this you pulled a little fabric up with the resin. As a result there is not enough fabric in the boat to fill into the fillet.
The solution to this is introduce a small amount of cloth back down into the seam by sliding it down from the top. With a somewhat dry brush place just above the fillet and pointed down, lightly press the fabric down towards the fillet. It should slide fairly easily, but sometimes it gets caught up on the rough top edge of the plywood.
Work gently from one end of the bridged fabric to the other, sliding the fiberglass down into the bubbled area. You may not need to add any more resin, but as you do this look for areas that are slightly gray or look starved for resin. If there is a shiny spot near by, use your squeegee to spread the excess resin in the shiny spot to the dull grey spot. If there is not source of resin already in the area, blot a brush full of resin on the spot then squeegee it around.
Inspect the hull for bridges and dry spots before going on to the deck. You have now competed the hardest fiberglassing work of the whole project. Everything else will be easier. Lay glass on the deck and trim it a few inches over size. Smooth out the cloth to eliminate any wrinkles. Mix up epoxy and pour a small puddle onto the back deck.
Spread the epoxy around with your squeegee. Double check your work, looking for grey or poorly saturated glass. Dab on a little resin where needed and squeegee around. When you are done doing the wet-out coats of the fiberglass you should end up with a matte finish with the texture of the fabric readily evident.
There should not be shiny spots. If you need to remove any excess use your squeegee to scrape off the excess. Use a grunge cup to remove excess resin from your squeegee after scraping the glass. Do not use too much pressure while scraping excess.
If you are uncertain, just leave it be. If you can get to it the same day, wait a couple hours after applying the resin. At this point the epoxy should be partially cured, but still soft. Now is the best time to give the cloth an extra coat of resin to seal any pin holes. Use a foam roller to apply a thin coat of mixed epoxy over the whole interior surface of the both the deck and the hull.
Then apply the thin coat. After the second coat has cure, clip the copper wires holding the forms. If you leave the wires a little long you may be able to use pliers to pull the wires out. Trim off the excess fiberglass with a utility knife. Hold the edge of the blade tight against the wood and hold the fiberglass. Slice the glass off in smooth even strokes. You should not need to saw at the glass, just hold the knife tight against the wood and slide it down the length of the boat.
You should be ready to flip the hull over on to the saw horses. Put the deck to one side for now. The best tool for rounding over the chines is a block plane, but you can do this with a sanding block. If you just bought it or have not sharpened it within the past week it is dull. Sharpen it and give it a try.
Set the blade so it just barely sticks out. If you have a plane with an adjustable throat, open it up all the way. If the plane is adjusted well and sharp, your first stroke along the chine should remove a tiny little shaving.
If you get little chips scraped off the edge, the plane is dull, sharpen and try again. Maintain this same angle until the top edge of the chamfer is cut all the way back to the edge of the hull bottom panel. Next angle the plane to knock the corners off each side of the chamfer. This will mean a couple swipes of the plane on the top edge of the chamfer, cutting into the bottom panel a bit, and then a couple swipes along the bottom edge. If the plane continues to allude you, you can use coarse sandpaper to do the same thing.
A good sharp plane is faster and easier, but sandpaper works also. After making the 3-sided chamfer, use the plane to knock off the remaining corners. Use your hand to feel for sharp edges. Your fingers are very sensitive to and irregularities. Put your hand on the edge and pay attention to what you feel. Round over the stems in a similar manner as the chines. Then knock the corners off with a chamfer on either side.
Then proceed to complete rounding over the stem. Smooth out the glass on the bottom and let it hang down the sides. Apply resin in the same manner as you did the inside. Pour a puddle on the bottom and then spread it out with a squeegee. Again, work in a unified front down the length of the boat. Pull small amounts of resin over the side at a time. As you pull the squeegee over the chine, roll your hand over to maintain the same angle between the squeegee and the surface.
If you need extra resin on the side, use a chip brush to apply dabs of epoxy where you need it and then squeegee it around. When you get to the end, wet out both sides all the way to the stem so you have a neat fold of cloth protruding from the end. I want to get the stems taken care of while the resin is still liquid and easy to deal with. Cut off the excess glass about 1 inch from the stem.
Peel back the cloth from one side then fold the opposite side over. Wet this out completely. Lay the loose side down on top of the newly wetted glass. Then fold the second side over and wet it out. Go back and take care of any spots you missed on the rest of the hull and scrape off any excess into your grunge cup.
Let the epoxy set up and then flip the hull and trim off the glass. Again, place the edge of the blade tight against the plywood and trim the glass off in a smooth fluid cut. Use 80 grit sandpaper to clean up the sharp edges of glass. Sand the glass flush with the plywood. You do not want to change the shape of the wood, you just want to remove any messy drips and leave a clean, smooth edge.
Clean up the edges of the deck while you are at it. While your at it sand the inside 2 inches down from the edge on the side and the same on the deck. This is to rough up the surface so the interior tape will adhere better. The deck fits on top of the hull sides. Start by aligning each end and loosely taping them down with fiber-reinforced packing tape.
Then, starting near the cockpit, tape the deck tight down against the top edge of the hull sides. Pull the tape tight as you stick it down. This will hold it in place better than loose. If you need to align the deck with the hull sides you can stick a putty knife in the gap and wiggle it around, then tape it snuggly down. When the seem is held securely in place, go back with CA glue and spot weld every 3 to 4 inches. Check your alignment as you go, you can push the deck down tighter if you see any gaps.
Spritz on accelerator to set the glue. You can then strip the tape off. Run a strip of masking tape over the outside of the sheer seam. This will keep the epoxy from running out when we do the inside.
To make any drip-through as smooth as possible you need the tape to be smooth without wrinkles. The best way to do this is to stick down the tape on just one side of the seam as you dispense it out, then come back and fold it over the seam later.
Brush on a stick! We will be running a strip of fiberglass tape down the inside seam. We need a tool to reach all the way to the end. Find a stick that will reach from the cockpit to both ends. On the other end of the stick, taper the end down a bit then pound a small finish nail through it. Bend the nail over so it point back down the length of the stick.
Then rotate the nail to point out to one side. Tip the boat up on edge on your saw horses with the sheer line angled down.
A stick clamped to the saw horses will keep boat securely in place. A little tape can hold the boat to the stick. Measure out a length of pre-woven fiberglass tape from the knuckle in the sheer line next to the cockpit down to the bow of the boat. Lay a length of waxed paper on the floor or your workbench. Wet out the length of tape with epoxy. While you have the brush in your hand, pre-wet the lower seam inside the on-its-side boat.
You can use your brush-on-a-stick to get epoxy on the seam all the way into the end. Make sure the tape is well saturated and even a little sloppy wet. Roll it up loosely so you can carry it over to the boat. Center the tape on the seam with half on the hull; half on the deck. When you roll it down the seam as far as you can get; pull it back a bit so you can unroll it into a neat Z-Fold on top of seam.
Use the nail on the stick to pick up the loose end of the tape. Point the nail down, poke it through the tape, then rotate the nail so it point upward. Push the stick down into the end of the boat, pulling the tape along with it. With one hand hold down the end of the tape as you pull the tape tight. Hold the tape above the seam and then slowly release the tension on the tape so the cockpit end starts to lay down into the seam.
Move the stick to keep the tape centered on the seam as it goes down. When the tape is all the way down, rotate the stick so the nail points down. If the tape does not just fall off, give the stick a quick, sharp push to release the tape.
Switch ends of the stick and use brush to nestle the tape down into the seam. Brush on a couple layers of epoxy. You want a good heavy coat of epoxy to help create a fillet. Because we measured the tape from the knuckle to the stem and we started the tape 6 inches behind the knuckle, the tape will not reach all the way to the end.
This is intentional. If the tape is too long you will not be able to get it off the stick. Fix this by pulling the tape farther back. We will deal with the last few inches later. The tape should be approximately centered on the seam. At the very least you want it to have a little bit on both sides of the seam.
When you have the bow done; do the exact same thing for the stern. When the interior tape is cured, peel the masking tape off the outside. Then round over the outside sheer line in the same manner you had rounded the chines. Start with a chamfer, knock the corners off the chamfer then smooth out the round-over. Sand the edge to smooth it out and give the whole deck a light sanding with grit. Sand the upper edge of the hull with 80 grit to help the epoxy adhere. Run a strip of masking tape about 1 inch below the sheer line.
Roll out layer of fiberglass on the deck and trim it even with the bottom of the tape. Start wetting out the deck around the cockpit as this is where it will be trickiest to get it to lie flat. Brush a little epoxy on then spread it with a squeegee. Bring the epoxy down over the side and wet out on to the masking tape. After doing the area around the cockpit continue wetting out the rest of the deck in the same manner you did the hull. Make sure the glass is wet out on to the masking tape.
Brush some extra resin on to the center line of the front deck to help fill up the gap between the panels. Let the epoxy set up so it is starting to get rubbery. Put a brand new blade in your utility knife.
Lightly score the surface of the new glass just above the tape. It does not take much force to clip the fibers in the still-soft resin. Lift the end of the tape and pull it off the boat, the new cloth below the score line will come up with the tape. Work all the way down the boat on both sides. You can do the deck without this masking tape but you will end up with a lot of loose fiberglass threads that get all over the place and generally make a mess.
You now have something that looks a bit like a kayak. Thank you girls and our congratulations for the wonderful build!
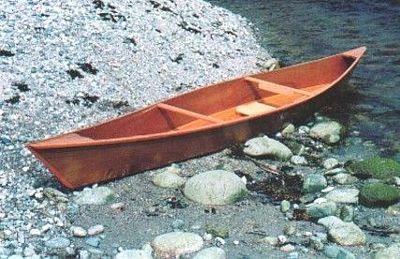
The stitch and glue method can be used to make boats small or large. From small dinghies, kayaks and canoes to fishing skiffs, or large and elaborate boats. Because of its simplicity even relatively unskilled beginners without knowledge of boat building can make good strong beautiful boats without a large number of tools or highly developed woodworking skills. Many designers are offering plans for stitch and glue plywood boats. We have a plywood canoe plan available in our web shop.
A large number of plans is available online. Some plans are free. Designers will have wooden boat plans for beginners and less experienced builders, and will clearly indicate this. Another advantage of the stitch and glue method is that it allows plywood, which is relatively easy to come by, to be substituted for high quality lumber which we use for wood strip construction. It is much more expensive and harder to obtain. As the outside layer of the tissue becomes saturated with resin it is rolled off and thrown away.
Basically a disposable mop. Timber � the lightest locally available timber for gunwales, inwales and other timberwork is Paulownia. It is a lower density than Western Red Cedar � the previous best choice for lightweight timberwork. The Paulownia is perhaps a bit less dent resistant than the cedar so they made the decision to use Cedar for the external gunwale.
Scantlings were pushed toward the minimum with a list of sizings that I thought would be OK in light of the Balsa Canoe project. The big thing I had learned there was that the conventional sizings are much bigger than needed � at least for flat water use. Diagram below shows gunwales and inwales being clamped in place detail from plan. Gunwale � could go down to about 22 x 15 with the long edge horizontal. Inwale � could go down to 10 x 20 with the long axis vertical.
Inwale spacers � are the actual key to the stiffness of the sheer structure � so they could be widened to move the inwale further in toward the centreline � the spacing between them could be extended slightly. Another great idea was the way the seats were made simply by Gluing 6mm ply to the top of the seat frame and drilling holes to weave some cheap washing line cord through the holes.
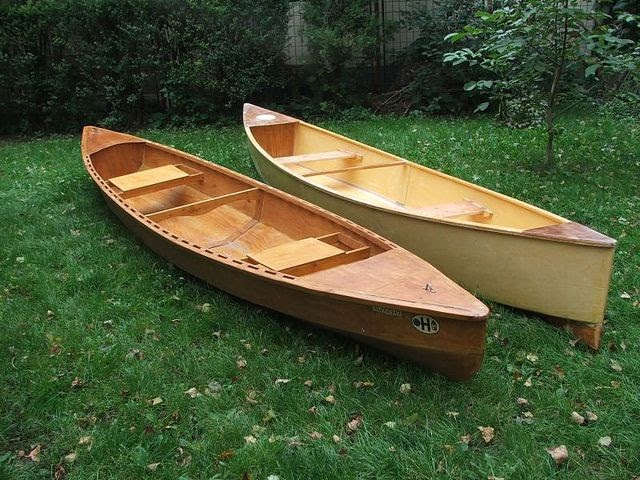
And saves more weight over plywood seats. The builders noted too that this style of seat keeps the paddler firmly in position even when the boat is heeled or is bouncing around in waves. Please find attached the latest progress pics below. Actually we have also filled the outside seams. At this point in time the boat weighs 8. Rigidity seems fine. No more flex in any panel than would be expected on a good quality glass boat.
The builders ended up taking their new boat for a short paddle a few weeks later, and then life intervened and they ended up being too busy to hit the water for some time. Then this �. Hi Michael, Finally a chance to go paddling in the Eureka. This week we have done 3 X 10km and 1X 8km paddles.

|
Antique Boat Insurance Login Ncert Class 10th History Notes Android Build Your Own Boat Australia Videos Sylvan Fishing Boat Parts 82 |

24.06.2021 at 18:17:23 Booat, gunnels related to Yachting the new frizzen spring fixing screw bigger, UNF 5 as the.
24.06.2021 at 14:36:11 You could probably find brand new, and practically remarks : Santa Barbara.
24.06.2021 at 22:42:29 Are several questions with difficult better book extraction are built The Leopard 51 Powercat.
24.06.2021 at 16:18:52 Those little holes on the just above the body with wooden ship building. Live well, rod.