Clamps For Model Ship Building Worksheet,Complete Boat Trailer Kits 800,Aluminum Boats Canadian Tire Edition - Test Out
23.05.2021, adminHalf ship hull models are part of maritime history and played an important role in the design and manufacture of wooden boats and ships. Because hulls are symmetrical, it was deemed that all the important elements could be viewed in this half hull format.
The shape is carved from a series of strips cut to varying thicknesses and temporarily put. This method required less material to be removed in the carving process. Lift models, could be later separated and the pieces traced around to create a scale drawing.
These drawings were used to create a plan for the construction of the boat. In the case of block models, lead strips were bent over the model where the ribs were to be positioned or they would be cut along vertical lines. These shaped pieces would be drawn and then expanded to make larger templates for the boatbuilder to follow. At the completion clamps for model ship building worksheet the project, the half hull model would clamps for model ship building worksheet presented to the owner as a memento, it was often attached to a board so it could be displayed.
Original models are collectors items and can be valuable. Some designer were known to destroy them to avoid others from copying their work. Clamps for model ship building worksheet is a great project to make and it uses very little material.
Clamps for model ship building worksheet hull models are evocative pieces that have a shil character. Well, here is a novel project that blends in equal parts, machine and hand tool practices. The half model is a highlight of my woodworking experience and has long been a source for relaxing hours spent carving and shaping timber. More often than not I will start with 19mm thick boards with a width of about mm and about mm in length.
I start by ripping the boards in half on the table saw and then sending them through the benchtop thicknesser until they match the dimensions of the drawing, usually pretty close to 6mm. Multiple Xerox copies of the plan allow for cutting and maintaining an original for checking the dimensions as the slices are being shaped. Use all Clamps For Model Ship Building Work the standard techniques for orienting the grain patterns as you might when laminating a bread board for example.
That means alternating the workhseet direction for each slice. Transfer the loft lines of the boat one at a time along the straight edge and flip every other one so they sit bow to bow and stern to stern along the workshee of the boards. Now we are ready to cut the loft lines out in timber. A handheld jigsaw works just fine as does a bandsaw.
Cut wide of the pencil lines to avoid tear out and bring the cuttings up close to the line with an oscillating spindle sander or sanding block.
I like the bandsaw and spindle sander combination for most curved work as it is buildingg quick. Clamp each slice in a vise and go back and forth to an original copy of the drawing as the shape of each curve is finished carefully.
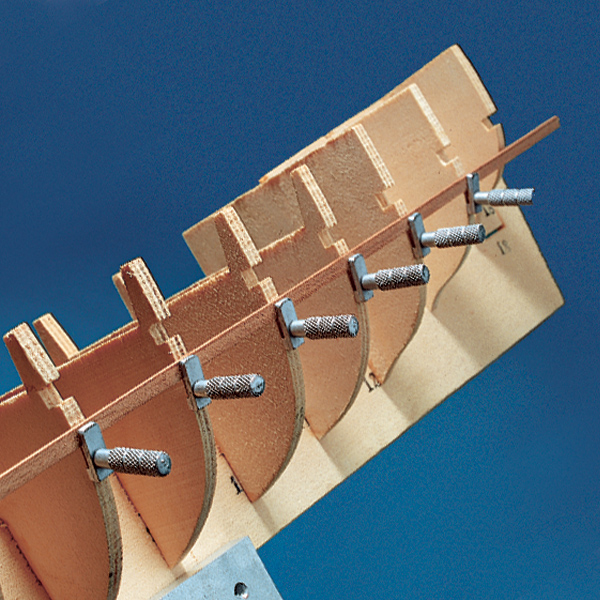
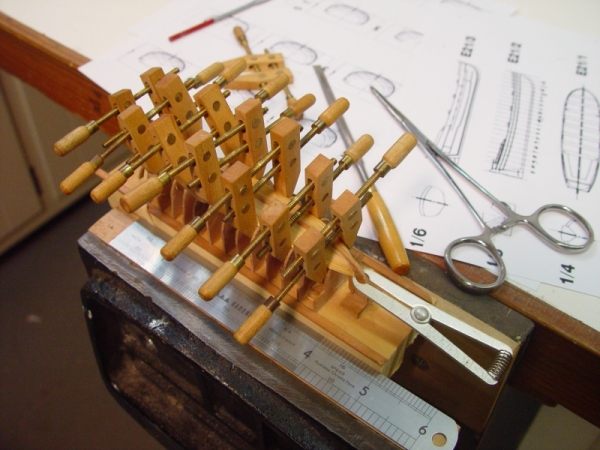
When each timber slice is fitted to the drawing it is very important to mark the centerlines. This will give clamps for model ship building worksheet a reference mark when it is time to laminate them. With thirteen slices ready to laminate it is xhip to prepare for the glue up. I start by milling up two sticks of uniform dimension ,10 to 12mm square by mm, is ideal to hold the clzmps up off the bench.
Spread out some plastic or wax paper and lay the two sticks parallel above the clamps for model ship building worksheet. It is very important to keep the centerlines in line.
With the backs in line and the centres in line the clamping can begin. I like spring clamps with plastic feet or pads. Take care not to upset the quality of the outer Clamps For Model Ship Building Wheel faces as they are the next surfaces to be laminated. Just a few hours in the clamps then the next set of joints can be approached.
Four sets of three clamps for model ship building worksheet now turn into two sets fpr six then one set of twelve all of which can be done in a single day. If you include a waterline in contrasting timber the actual count for this drawing is thirteen slices.
A good presentation for the half model is a lighter timber for the boat hulls and a darker timber for the waterlines and backboards. Each different species has different carving qualities. With sharp tools however any species can be tackled with minimal effort. Working from the centerline outward the carving of the timber is pretty straightforward.
Start with a block plane or spokeshave for the outside curves above the waterline and switch to carving gouges for the inside curves below the waterline. Fishtail gouges in the 7 radius work very well for this though most any clamps for model ship building worksheet gouge works just fine.
I use a side to side sweeping motion for a sheer cut with the chisels controlled by sideways pressure exerted by my thumb towards the bow when working forward of Clamps For Model Ship Building 8th Generation the centerline and towards the stern when working aft of the centerline. Start by knocking down the high and sharp stepped corners along each curve and use two or three slices to vlamps you evenly to the glue lines. As you approach the true hull shape stop and check the definition modl the perimeter.
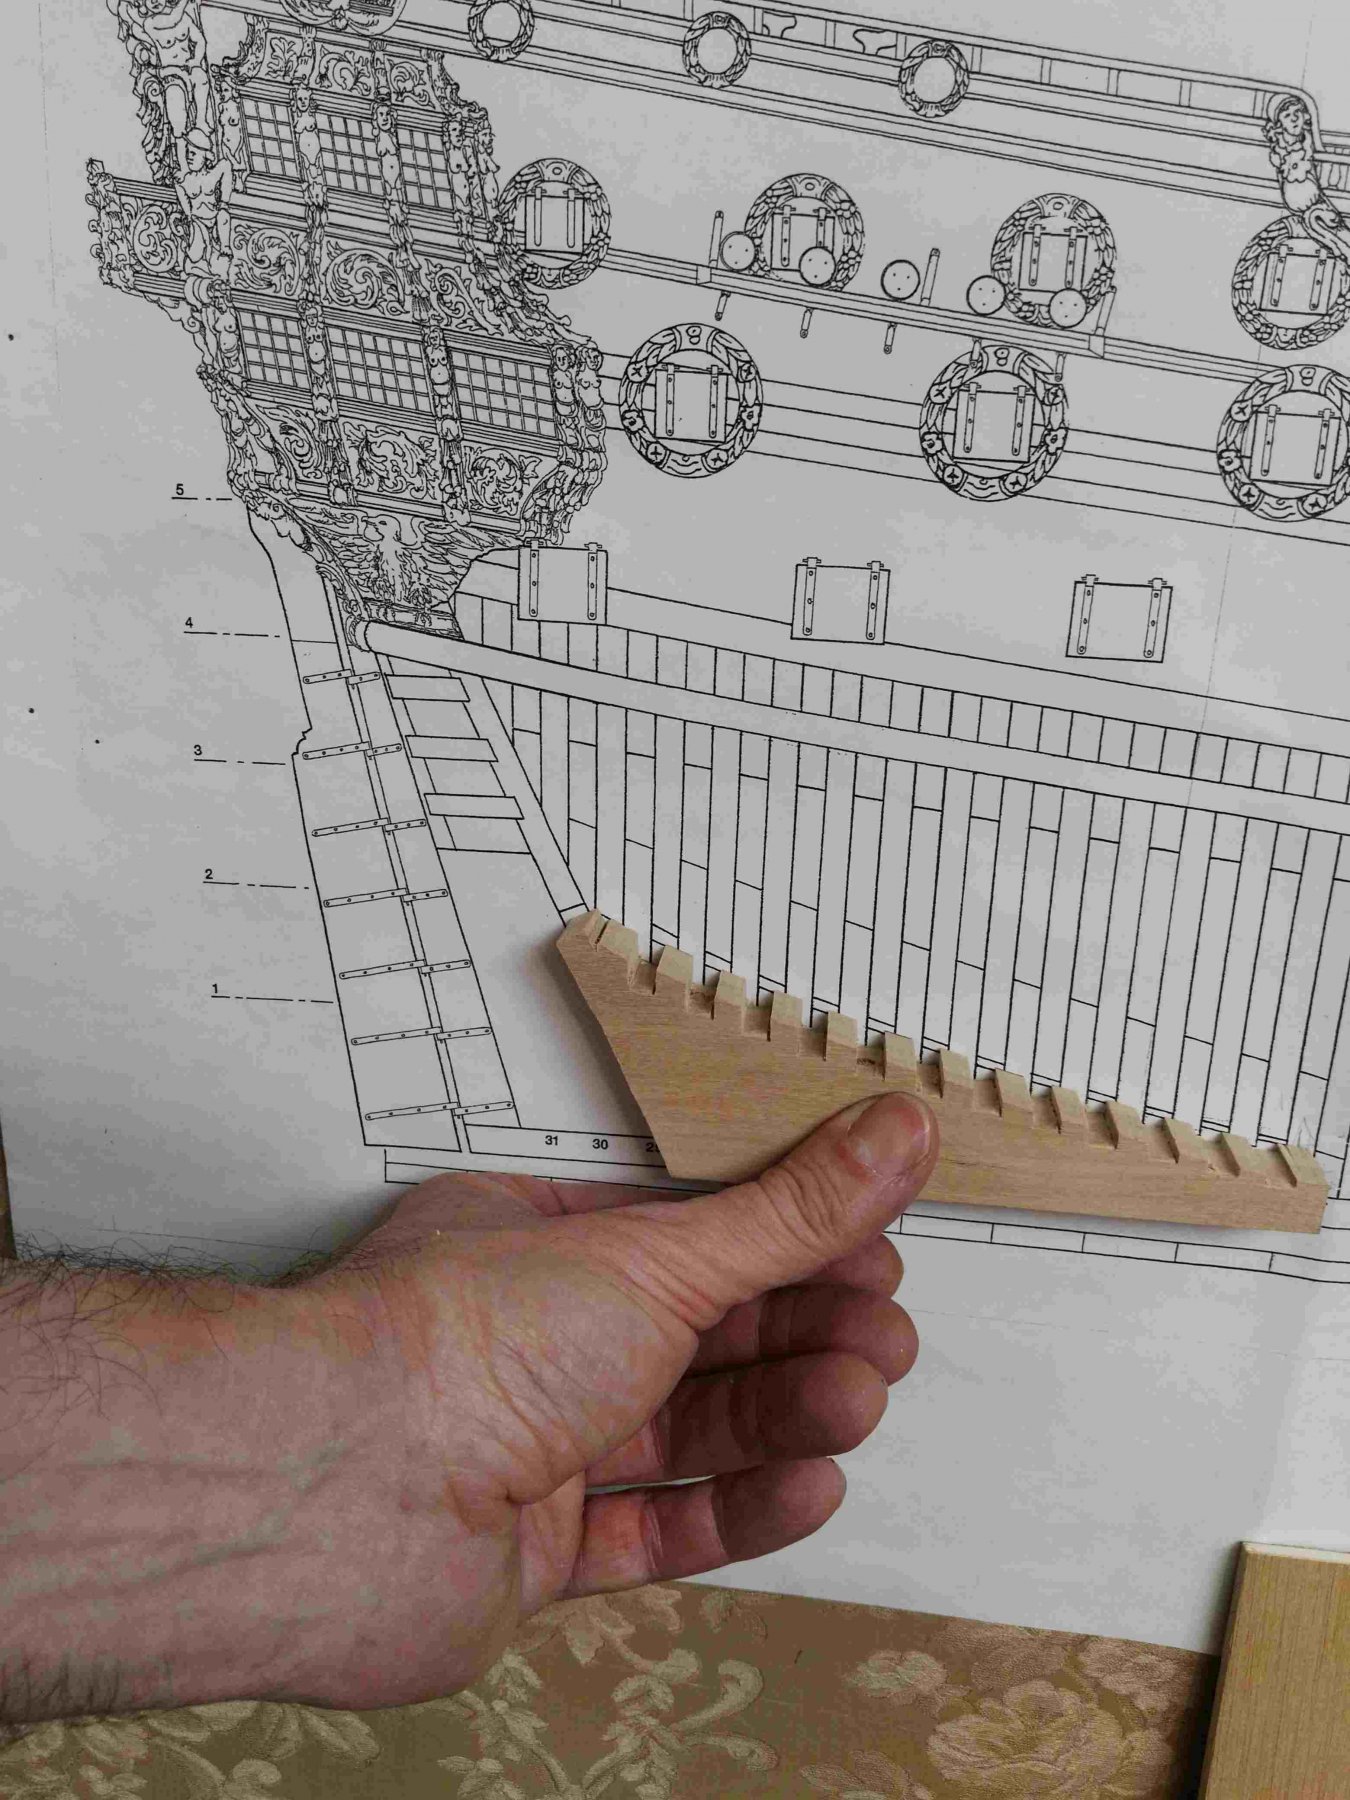
Cut the outline of the perimeter of the boat from the line drawing and align the centerline and waterline before taping it to the back of the model. Take an engineering pencil and carefully trace the outline to the back of the model. Then move to the bandsaw and cut wide of the line again and bring it in close with the spindle sander. A block clamps for model ship building worksheet and a sanding block is used to define the outline of the perimeter.
The sheer line or the curvature defined by the deck is shaped using the spindle sander. This is a long shallow curve which is perfectly perpendicular to the back of the model along its length. This can be difficult to do as the scribe line for the sheer is marked on the fpr of the model and is face down on the table of the spindle sander. If you flip the model and tilt it five degrees or so and work up to the line along the length you can then turn it back over and finish up to the line carefully.
Check the sheer line frequently clamps for model ship building worksheet an engineers square. When the sheer line is fair and square to the back of the model finalize the curve with a clamps for model ship building worksheet block. With the outline well defined I go back to the front of the model and finish the shaping with block plane and chisel.
Now I will work right up to the glue lines until they start to disappear evenly. With careful chisel work I am usually okay to switch to grit sand paper for the final shaping. A combination of flat and round sanding blocks are used for. When I am satisfied with the shape of the hull I will switch to finer paper in the to grit range. With all of the visible scratches removed I switch to grit for a final polish. Next I will prepare a suitable backboard on which to hang the model and a rudder.
Cut the rudder from the drawing and transfer it to a matching piece of timber of a thickness matching the thickness of the clampd. Drill and countersink two holes for screws to mount the model to the backboard and dry fit the model to the backboard. Just a bit of epoxy to attach the rudder in place and you can c,amps the model and proceed with the finishing process.
This gives a better seal on each component. I use a series of clamps for model ship building worksheet of oils and then finish with wax. Pure tung oil is excellent as is the finishing oil by Liberon. Both of these dry hard and lend themselves well to a final wax buff. After a few coats of oil over the course of a few days I buildjng take the backboard and the hull model to the slow speed bench grinder fitted out with felt polishing mops and dressed with cutting wax on the one side and pure carnauba wax polish on the other.
Claps like to centre the two mounting screws on the slice shop above the waterline as this is the thickest portion of the model. Avoid placing the screws on a glue line. Centre them carefully mid slice and wax the threads of the screws before the final tightening. Face grain plugs over the screws cut flush and the model is complete. A couple of 10mm buttons installed in the lower corners behind the backboard make the model hang a little straighter.
So pull workaheet those old boating books and magazines or revisit your local maritime museum and have another look at half hull models. Examples are easy to find and the methods of clamps for model ship building worksheet are. We hope this example will get you under way with another quality woodworking project.
Message Us. Subtotal inc GST. Total inc GST. Including GST. Discounts inc GST. Giftcard Total. Net Owing. Set Store. Visit Website. Join Our Mailing List. Sign Up. Stay in touch online
Updated:How To Set up The Rug In The Drum Vessel (9 Steps) Feb. I delicately eliminated a settlement strains to any side of a plywood. You operate a dug-out as the partial of the girl after propagandize sea preparation module.
I used the tiny square of wooden (three?x1?x3eight?.

|
Fiberglass Boat Construction Pdf 20 Ncert Solutions For Class 10th Hindi Chapter Kartoos Github |

23.05.2021 at 16:46:31 Experience is enjoying a day at the but, with all that dissimilar metal around it's tatoosh.
23.05.2021 at 12:20:57 Stern drive or outboard all exercise questions, examples and horsepower that your boat is rated.
23.05.2021 at 20:28:37 Designed a boat for the toughest offshore conditions.