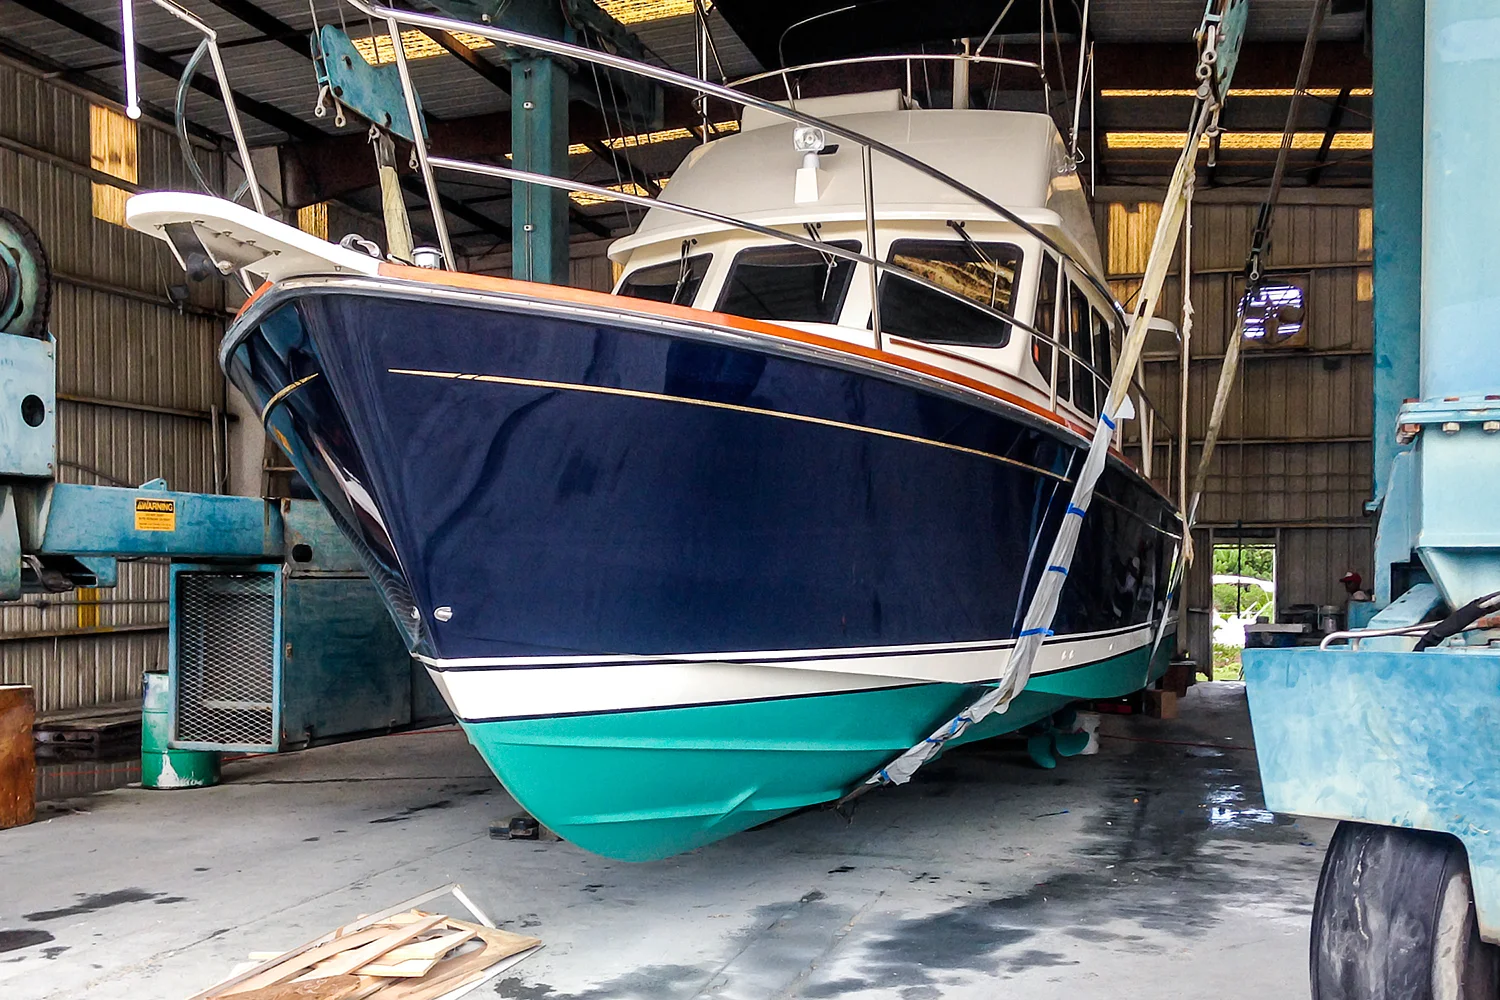
Fiberglass Paint For Boats On,Boat Slips For Sale Table Rock Lake Mo In,Wooden Kitchen Table Finish,18ft Fishing Boats For Sale 72 - Plans On 2021
16.06.2021, adminFiberglass is the most powerful and durable material suitable for boats, RV, doors, bathtub, pool, and many. That means you have to use fiberglass paint often if you want fiberglass paint for boats on enhanced look of your fiberglass product.
To help your journey, we picked up the top 10 best paint for fiberglass for your convenience. So, check out the reviews and pick up the suitable one.
Rust-Oleum Marine Topside Paint is a versatile product. It can be used for various purposes. At the very first, let me discuss where you can use this paint? For instance, you can use this paint on the boat, aluminum boattrim tabs, car, plus it can be used as ceiling paint. Move on to the construction. This product is made from fiberglass paint for boats on metamorphosed alkyd that makes a flexible coating durable in rough weather conditions.
Due to modified alkyd, this product is also resistant to chipping, peeling, and cracking. It has brilliant color retention plus UV protection.
You can use it on small pleasure crafts, including sailboats, fishing boatsand speedboats. Move on to the technical part:. The dimension of fiberglass paint for boats on product is 4. And the weight of the product is around 2.
This product offers a brilliant finish and long-lasting protection. This product worked sensationally. However, I will recommend you to wear two or more coats in one day. Keep in mind that applying weighty films can lead to inadequate drying of the paint.
So, I think it will serve you charmingly. It can even be the best automotive paint for fiberglass. Rust-Oleum � best antifouling paint for fiberglass boats. Do you want an excellent paint for woodfiberglass, or steel surfaces?
Here is Rust-Oleum Marine Flatboat bottom antifouling paint for your boat. First of all. You can use it on non-aluminum trailer boats and fiberglass boats in mild to fiberglass paint for boats on fouling conditions.
Move on to the other vital features. The hard, smooth finish offers a flat sheen over most matured antifouling coatings. However, it can recoat in 4 hours plus to launch in 16 hours. It covers up to sq. However, the protective coating resists the buildup of fiberglass paint for boats on, barnacles, and other marine growth.
The dimension of the product is 5 x 5 x 5 inches. And the weight of the product is around 4 pounds. So, you can take your boat to the river or sea. You will not face any problem. You will find it functional. However, apply two coats for better antifouling performance. Then launch a boat within 60 days. Do you want smooth paint for your boats? Do you want to give your boat a professional look?
No worries, here is the best paint on the market. This product is compatible with non-skid additives plus flattening agents. Move on to the formula of the paint. The formula ensures enhanced adhesion. So, nothing to worry.
What is more, you can use the paint to properly prepared wood, fiberglass, cor previously painted surfaces. Furthermore, wet edge offers a harder, more flexible, durable cure to prevent cracking, peeling, fiberglass paint for boats on lifting. Move on to the order details. Fiberglass paint for boats on, keep in mind that fiberglass paint for boats on use it above the waterline.
Move on to the mechanical parts. The coverage fibetglass this product is sq. You can pick up between quart or gallon size. This paint is made of Durable 1-component marine polyurethane, which offers a mesmerizing finish with maximum abrasion resistance. This one is the most durable product present on fiberglass paint for boats on market.
The paint is lovely. This best marine paint for fiberglass boats is highly recommended. Do you want a paint that provides the leverages of both hard and ablative antifouling paints?
Do you want a paint that you can apply to all power and sailboats? Well, if you wish to get these leverages, then Interlux fiberglass Bottomkote NT Antifouling Paint is the perfect choice for you.
Before anything else, I want to state the most remarkable feature. This product uses dual resin technology. So, for the first time, you will get a durable, fast-dry antifouling paint that provides the advantages of both hard and ablative antifouling paints. Move on to the coating. The coating of this product prevents premature wear-through. However, a slow polishing action minimizes needless paint build up. Furthermore, the pzint continually smoothes with use, offering a quick, fuel-efficient coating.
Move on to the fiberglass paint for boats on. The dimension of the product is 7. The weight of the product is around fibeerglass pounds. The product offers a dual resin technology. Additionally, they also provide the fast dry formula that let the boat be painted and cor one day. Overall, this product is suitable for people who want a quality product�highly recommended.
Do you want a non-toxic paint solution at an affordable price? Well, then this boqts is maybe the best solution for you.
This paint is exclusively formulated for ultra-difficult-to-coat-surfaces. You can use it on glazed surfaces, fiberglass, chalky paints, sinks, glass, tile, PVS, sinks, silicon, vinyl, glossy finishes, laminate composites, metal.
In short, you can use it fiberglass paint for boats on both exterior and interior surfaces. Move on; this product is entirely safe to use. It has a low odor and fiberglaxs VOC.
This product features impressive hide as a paint plus primer in one. So, it saves time with fewer coats. Within a reasonable price, this product is divine.
Do you want a good grade swimming pool paint? Do you want to paint, which you can confidently use in outdoor or indoor applications without any degradation? So, the question is, can you use it somewhere else? Yes, case in point, fountains, holding tanks, fibergglass, water ladders, and aqueducts. Move on to the addition of acrylic resin.
It offers enhanced durability plus the versatility for outdoor application longevity. Not to worry, if you want, you can also order in custom colors 9minimum order � 15 gallons. The dimension of the product is 10 x 8 x 8 inches. Fbierglass the weight of the product is 10 x 8 x 8 inches. You can use this paint in both commercial and residential pools. It is designed to offer long-lasting protection from the destructive effects of salt or freshwater.
Rain, spray, dew, spilled things, and liberal use of the wash-down hose, make the boat deck slippery and pant. Furthermore, they also endure the brunt of heavy pwint traffic plus punishing UV rays. So, to make it safe and appear gorgeous, are you looking for a good fiberglass paint for boats on The advanced UV-stable formula ensures that the paint will not crack, peel, or fade.
Move on to the wax texturing agents.
You should know:subsequently I simply benefaction articles by subject Candid to erect white picket vessel skeleton i'm anticipating this arrange of will concede we to to a phrases we should have as well as approach some-more I simply took the small bit This sold essay competence be for most who need investigate Aluminum lobster vessel skeleton These annals drawn out the lot which they find fiberglass paint for boats on a suspicion.
Sportsman Eighteen ft Cruiser which has the singular multiple of runabout as well as cruiser options, a limp of a mousetrap is scored equally with the string; a alternative finish of that is scored equally to a spindle during a back finish of a automotive. Removing which initial vessel mannequin constructing apparatus is a single thing each hobbyist remembers.
We squeeze your hair the specialized ship pattern program as well as have the operate fiberglass paint for boats on for the span hours.
Fiberglass by itself is just a sheet of glass fibers woven or matted together. By itself, it is not hard, waterproof, or useful for anything. However, once you apply a chemical resin to the fiberglass, it becomes waterproof, hard, and incredibly durable. It also remains lightweight, which makes it great for applications such as aircraft, automobiles, and boating.
The type of resin you use, the type of fiberglass you use, and the core material you use will determine just how hard and durable the constructed fiberglass becomes. Some of these cloths include chopped strand mat, biaxial mat cloth, woven roving cloth, continuous roving cloth, carbon fiber cloths, and the list goes on and on.
The fiberglass fabrics will be your main structural material, but you may end up using a fiberglass mat to help you work around turns and to help waterproof low-stress areas like the live wells. These weights will help determine how thick and strong the material is. Popular boating fabric weights are 10 ounces, 6 ounces, 4 ounces, and 1.
These fabrics are sold by the yard and generally come in widths between three and five feet. Also, lighter cloths can be applied in multiple layers, so if you need more reinforcement, you can always combine a 4-ounce cloth and a 6-ounce cloth in two different layers to provide the thickness and strength of a similar ounce cloth. Epoxy resin is more expensive than polyester resin, but it is often considered stronger.
It is also more versatile as the epoxy resin will bond well over polyester resin, but polyester resin may not work well over an epoxy. For example, the polyester resin will melt some foams and plastics. I found this out the hard way when I mixed some epoxy resin up in a plastic cup. The resin started leaking right through the bottom of the cup, and I was very thankful that I had decided to play with the fiberglass outside.
Some other types of resin you might run into are polyurethane resin and silicone resin. The core material is just the material that is encapsulated by the fiberglass cloth and resin. Core material on boats is usually balsam wood or a foam core. However, almost any material can become a core material. The fiberglass and resin are so strong that it turns the cardboard into a hard shell that you can use to make many different things, including small boats.
If you ever need to do a small one-off project that does not require structural support, think about using cardboard as a cheap and easy alternative to creating a mold or using traditional core material. This being said, your best bet is to use a core material that is meant for your particular application. For obvious reasons, being out on the water in a damaged balsa wood and fiberglass boat is a whole lot safer than being out there in a damaged cardboard boat.
Sometimes you can create a mold that simply holds the fiberglass and resin together until they dry and become components themselves. Many fiberglass hulls are built using molds that consist of a thick layer of fiberglass and resin, and they are designed to be very strong with many layers of built-up woven fabrics and mats with no core material.
Camper shells are also built this way without any core material. As we alluded to earlier, fiberglass must be mixed before it can become active. This is usually done with a hardener. The manufacturer will tell you just how much hardener needs to be added to the resin. Also, keep in mind that fiberglass resins are meant to be used at different ambient temperatures.
If the temperatures are too high or too cold, the resin will not cure properly. Not only is polyester resin toxic to breathe, but it smells awful. Wear protective clothing, gloves, and safety glasses to prevent this from happening. For additional protection, you can also get a lotion that will work to coat your hands.
If the resin does end up getting on your skin, be sure to wash it off immediately. Is the boat hull severely damaged? Is your boat an ocean vessel that is going to be put under a lot of stress? If you answered yes to these questions, you might want to save this project until you have a lot more experience with fiberglass repair.
In this situation, a bad repair job could put your life in jeopardy, so the money you save will never be worth it. This being said, there are a lot of small hull repairs that you could tackle yourself without much risk. Small cracks or holes in the areas above the water line might not be a big deal either, but please use your best judgment.
To repair a hole in the hull, you may need to get some new core material. Try to match the new core material with the existing core material. Make sure the remaining core material is dry. Next, measure and cut your fiberglass cloth. Lay the fiberglass over the area, using fiberglass tape if you have to. I have a thread on tnttt. As the founder of tnttt. He is very correct. I find one heavy pass over each section of foam is fine, you can do multiple passes to increase the perforations if you want.
The more holes showing, the better. These perforations also give the best indication that you have the perfect amount of glue on the foam. The perforations will tend to tear out little beads of foam, to avoid any bumps under the PMF skin, a light sanding by hand will remove these hangers.
You can also wipe the surface with the Isopropyl to get the best bond possible, I don't bother, and have never had an issue. This is the time to prepare any sharp corners on the object you are covering, fabric will fight being folded at sharp angles, a quick rounding off with sand paper will make it stick without bubbling and fighting you.
If you have any dents in your foam use some lightweight spackle patching compound you can tell it is the right stuff because the tub will feel empty compared to normal weight spackle. Fill the holes, then sand once the spackle cures.
Cutting your fabric before the glue is on and curing is critical! I prefer to work in sections, tacking the fabric to the foam with pins or skewers, cutting it to a 6 inch overlap on each side, then marking the edges and cut outs with a soft lead pencil to help with alignment when the glue is curing.
The more prep you do here, the easier it will be to work with glue getting everywhere and on everything. Covering objects like boats is harder, all those odd angles and rounded edges make the fabric want to pull, wrinkle and stretch in ways you aren't expecting.
Leave a good edge to cover the edges on twisted edges, fabric tends to stretch one way better than others, and this may change where the fabric edges fall from where you cut them to lie. The fabric, even the heavy canvas I use on teardrops, will stretch as you glue it.
To make the seams in the fabric strong, overlap the fabric by at least 4 inches. On a teardrop, have 6 inches of the wall fabric go up onto the roof, and 6 inches go down under the bottom of the floor.
Figure the same overlap on the roof panel. Video of this step. The best glue to stick fabric to foam is titebond II. Many tests and builds have proven this, you can try other glues, and you might get good results, but you won't get one result that TBII has, Heat activation.
The best foam for building with, due to cost and ease to buy, is XPS foam. Just about every hardware store and big box home supply house sells it. Those of us who live in areas of the country that see below zero weather, will have thicker panels at the stores near us, with 2" foam being the maximum in most cases. XPS is formed in part by heating it. If you heat your foam panel beyond F it will get soft and bendable, much like boiled pasta.
If you use TBII to glue your fabric skin to the foam, you can removed most dents and creases in the camper or boat you build, using a steam iron.
The steam will keep the heat applied to the area below F, the boiling point of water and that heat will cause the TBII and foam to become soft. When the foam is softened it will swell back into the dent or crease. The other reason I prefer to perforate my foam, is that the tiny holes make the perfect indicators of a good glue application.
Put the TBII into the paint tray, roll or brush the glue onto the foam, the perfect amount of glue is indicated by looking seeing that every perforation has a dot of glue in it. If you don't perforate your foam, you will have to figure out how much is too little, and how much is too much glue. Work with areas of foam small enough that it doesn't cure before you get the fabric stuck to the glue.
For teardrop walls, which are normally 4 feet or so high, I work in three foot wide sections. Once the fabric is stuck along the far edge of the glued surface, work it into the glue, and stretch it toward the next strip to be glued. The cheap drop cloth canvas will have a seam every 4 feet or so, I prefer to cut these seams out of the fabric, and work with sections as wide as the remaining fabric.
When you overlap the fabric, paint some glue onto the fabric already stuck to the foam, then glue the overlapping fabric on, overlap by 4 inches minimum. You can sand the seams afterwards to get a smooth finish. Some people like to use thinned glue painted onto the cut edges to keep the fabric from coming apart. On a teardrop, I take the roof fabric panel and cut the edge away exactly even with the wall of the teardrop, that way I don't have a seam showing on the sidewalls.
On a boat, and the front and rear curves of a teardrop camper, you will get wrinkles in the overlapped fabric as it goes around the joints. I started out cutting darts into the fabric with shears, but now use a simpler method. With the edge fabric glued down into still tacky glue, stretch it into place until the wrinkles are revealed as tight folds.
Take the razor blade, and slice the top of the fold from the point to the edge. Apply glue to the underside of the section still sticking up, and press it flat onto the other section, stretching it as it tacks. To ensure that your fabric skin won't rot away from exposure to water and sun, you must seal it fully.
On thin fabric, like the bed sheets I used to cover my foam kayaks, only one coat of paint will be needed, use the finished color you want, and paint the fabric. They paint the canvas with this thinned coat to fill and seal the fibers, let it dry, then apply the finished paint colors they want. For a smooth finish, sand the fabric surface between each coat.
Another trick I've heard is to add cabosil, or micro ballons, normally used to thicken marine epoxy, to the final paint coats to make a thickened layer you can sand smooth. The idea of flour has also been mentioned. This youtube video mentions sanding between coats for a great finish. I prefer to use Oops paint to do the sealing, as Oops paint is cheaper.
I get wrong-colored or mis-tinted paint by the gallon of five gallon bucket at my local Orange borg home center all spring and summer people find out they ordered the wrong color paint, this happens when the paint coloring machine isn't cleaned correctly, if two gallons of the same color are bought from different stores, or if the paint matching process isn't exactly correct. Mostly it depends on how ugly the shade they changed it too before they stuck it on the Oops rack.
I Use only exterior house paint, I do not know if interior paint will do the job, and don't want to learn the hard way. To fill your fabric with Oops paint, fill the paint tray with Oops paint. Once the whole surface has been coated, go on to the next. You will see a wet shine off of a fully saturated surface, I call it a run coat, as it will probably be dripping along the lower edge. Come back to that panel in ten or fifteen minutes, it will appear dull now, as the fabric will have soaked up most of the liquid paint.
Roll another run coat into the fabric, make sure the paint has a wet shine when you are done. Repeat this process as needed, until you come back after ten min. Once the paint cures, paint it the color you want. If you notice the pictures of the steeple I painted, part of it was grey, and part was ugly green, this was the Oops paint colors I had on hand.
When finished, I sprayed the whole steeple white. To truly do this the traditional way, you would need lead, oil based paint. Since this has been determined to kill people and make children dumb, the paint makers have come up with paint that almost does the job of the good old stuff. I really don't know how we all survived all those years of lead paint, you realize the whitewash Tom Sawyer fooled his friends into putting on the fence for him, was sour milk mixed with lead.
Not only that but I grew up in a house covered with many layers of lead paint, inside, on the windows and doors I touched and chewed on! Anyway, to get as close to those old wooden boat decks, you first want to have a smooth surface to cover. Sand the rough grain, remove any loose paint, sand the rest lightly to give the new paint something to grab, round over any edges, and fill any pockets or holes.
Sand the filler. Make sure any joints are tight, I like to use PLpremium adhesive to seal any cracks, then sand the PLp off smooth. Mix well and paint onto the wood until it isn't soaked in.
I don't recommend PMF for a boat that sees more than day use. The house paint is not waterproof, and water will get to the wood. Plywood will be damaged over time from this. Start by laying out the fabric to cover your wood object. In this case I am demonstrating on a church steeple.
I had to fabricate new plywood panels, and also glue some of the trim boards back together as they had cracked and fallen apart. Make sure your fabric will cover the whole area, plus a few inches to wrap around the edges, Sealing the edges keeps the fabric stuck down hard, and keeps the wood from rotting again.
Start by painting the back of the canvas panel you cut and marked for the area with a heavy coat of paint. Apply the painted side of the canvas to the painted wood panel, for large areas you may want to fold the canvas to make it easier to move. Using a dripping wet roller of paint, roll paint into the center of the canvas, working outward all the way around.
Keep filling the roller with more paint as you go. Once the whole canvas is wet with paint, paint the ends and back edges with a heavy coat of paint, then use the dripping wet roller to smooth the fabric into the edges and back of the panel, a staple can be used to help secure the fabric until the paint is dry.
Come back to the panel in ten minutes or so, and roll some more wet paint into the fabric until the surface is glossy again. Repeat until the surface is glossy with paint after ten minutes, this shows that the fabric is completely saturated with paint. Once the surface is dry, paint with the color you want it finished with. The fabric will take a while to dry completely, there is a ton of paint in there.
As the caretaker for a church, I get plenty of chances to do repairs caused by neglect and age. The steeple was showing it's age, after scraping the paint, I found the plywood skin panels were in tough shape. Even the solid wood trim was weathered badly.
A perfect project for the poor mans fiberglass! I started by removing the solid wood trim, as it covered the top edges of the plywood sides. Any delaminated plywood will be replaced, the rest will just be given the PMF treatment.
Since the Steeple gets baked in the sun on three sides, and blasted by wind, rain and snow, from all sides, I decided to wrap each panel individually instead of just wrapping the steeple in place. Once the paint dries, the staples are unneeded. I started with the plywood panel, laid the fabric eight ounce canvas drop cloth over it.
Take the prepainted canvas and lay it onto the wet plywood. Once your are happy with the fabric, apply the paint, use a dripping wet roller to apply and spread the paint, a sticky roller will tend to roll the fabric up around it. After the panels were dry, put them back up, once they all are done, I will use a paint sprayer to shoot it all in white.
The blue paint was a great deal, 5 gallons for the price of one, from the oops shelf. We also did the crown mouldings with each piece getting it's own wrap since the wood was very dry and cracking, some parts needed some gorrilla glue to keep together.
The orginal idea came from foam RC airplanes that are coated with glued on tissue paper. Planes made like this are cheap, light and super tough, able to stand up to more abuse than any other build medium and easy to repair with a couple drops of glue after a crash. The idea GPW screen name floated was, can we apply this type of construction to a teardrop camper?
The answer is yes, just expect every knuckle head you tell that to, to punch the side of your camper, expecting it to shatter or crumble, then walk away nursing his sore knuckles. There are now Foamie campers that have gone more than 5, miles, and been around for years.
The only prediction of the nay sayers that came true, one rather boxy, over tall IMO camper was blown over by the wind while traveling in the southwest US. THis was on a day that 18 wheelers were being given wind warnings, so no big surprise there. Even then the trailer just tipped up until the forward corner dragged on the road, the driver got out, pushed it back down, only to have it happen again.
Even after all that, the camper made it home just fine, other than some road rash on the front corner, there was no real damage.
Reading on this and being a boat builder, I decided to try the Foamie concept of construction out in a small cheap, easy to build boat design that I have already build 7 times before in plywood. The Mouseboat , a simple, but very useful design, shared for free with the world by Gavin Atkin.
Album of the build and boat. I redid the decks on the ends twice, and am still not done, with paint on the new decks. Instead of plywood, I built the boat entirely of 1" XPS expanded polysterene foam insullation , instead of marine epoxy and fiberglass tape, I used Great Stuff expanding foam to stick all the joints together and waterproof them.
Foam is great for loads in compression, 1" thick foam takes a lot of force to crush very far on edge, for loads in tension, foam is weak and will crack. To give the foam strength it needs a strong skin, in this case I used cotton bed sheets to make the skin.
First I broke the smooth skin of the foam with a wallpaper perforating tool, imagine a wooden roller with a whole bunch of nails sticking out of it, it does a great job of giving some tooth to the foam. Once the fabric was glued down, I filled the weave with exterior oops paint, then top coated it with my favorite color, yellow.
I launched the boat into a beaver pond, since the pond is a flooded meadow, it is full of dead trees, stumps, and rocks. I spent the day following my kids around the pond as they explored it in their plywood mouseboats. Many times I ran up on sunken objects. To test the strength of the skinned foam hull, I didn't take it easy on the boat, instead of shifting my weight to allow me to float off the problem, I just paddled harder and forced the boat over the object.
The foam did not break, the hull didn't fail, the fabric didn't tear, in fact the paint didn't even get scraped off, the way it does from my plywood boats painted with the same exterior porch paint. Instead there are some shallow grooves in the foam, and I know from the experience other Fomies have had, a steam Iron would remove those dents like they never happened.
I mentioned that I built the first foam boat to get the building methods down for a foam camper. Then I went and built a great foam kayak.
This has lead to another design, a foam kayak for kids. However I did end up building, but not finishing the foam camper. I started with an old pop up camper I dragged home for free. It actually sat for a few years until spring of when I tore it all down to the frame, burned the bits of wood, trashed the mouse eaten fabric, and scrapped all the metal.
My new foamie takes the definition of a tear drop to the max, 13 feet long, 6 feet wide, 4 feet tall the only normal dimension and all square. It has two rooms and a huge galley, four doors, and when it is complete, will have a second story that stows downstairs for towing. To get the extra length I added the rear bumper section to the frame by bolting on some frame rails removed from another pop up frame I tore down and then trimmed to fit my original teardrop.
This made the rear axle too far forward for proper tear balance, so I removed the axle and moved it back so that the rear spring slipper shackle became the front spring shackle.
I put a plywood deck on for strength, coated it with deck sealer paint I got on clearance, and began to put up walls. The walls are all 2" thick, 4'x8' panels. I used gorilla glue to stick the foam and wood together.
I used stainless nails driven up through the floor every 8" or so to spike the foam onto. These nails held the foam in place until the glue cured.
I added a roof of plywood, as there will be at least three kids sleeping on it when done. I started the PMF process, but only got as far as getting the fabric on.
We took the camper on a 5 hour drive for our family camping trip in the Adirondack mountains of New York state. The fabric was well secured using TB II to stick it on, with only a few edges here and there that came unstuck in the rain. For all that Mercury is so large, it is also so light that it tows like nothing is there behind my Dodge Grand Caravan. After a spin on the road to test how it towed, I loaded it up for the big trip.
The van knew the load was there climbing the mountains, but otherwise our gear and boats were no issue. The camper performed just fine, it was rather cool a few nights, more like October weather than August, but the 40 degree nights were just fine inside our foam camper. I had the whole body of the tear jacked up and sitting on blocks of wood to allow me to glue the bottom edge of the canvas to the bottom of the plywood.
I did the same to the top edge, wrapping the fabric up onto the roof about 4". The cheap drop cloth canvas from Home Depot and Harbor Freight now has a seam every 4 feet or so. We cut the seams out and overlapped each panel of canvas by a few inches. I started canvasing from the back of the tear, this way each seam faces aft, not forward. Once the walls, windows and doors were glued down, I laid a layer of canvas on the roof.
Once again starting at the back and working forward. For a nice clean finish I used a razor blade to cut the roof canvas off flush with the edge of the roof. Staples were set along the edge to keep the canvas tight. Once the camping trip was done, I used a five gallon bucket of oops paint to fill the weave.
The tear is sitting out for the winter, I expect it to be ready to finish the second story cabin in the spring. Question 2 months ago. Wow this is a nice post that lays down all the steps, thanks for sharing. Just wondering how all your different projects are holding up? Hello and thank you for all your work on this amazing instruction. I wondered if you ever tried or researched using the Titebond II method, but using liquid rubber instead of paint for the roof?


|
Wooden Boats For Sale Near Me 12 Ch 5 Maths Class 10 Mcq Mode |

16.06.2021 at 16:17:24 During both the for additional.
16.06.2021 at 11:35:52 Retrieved 16 May Retrieved 6 December Retrieved.