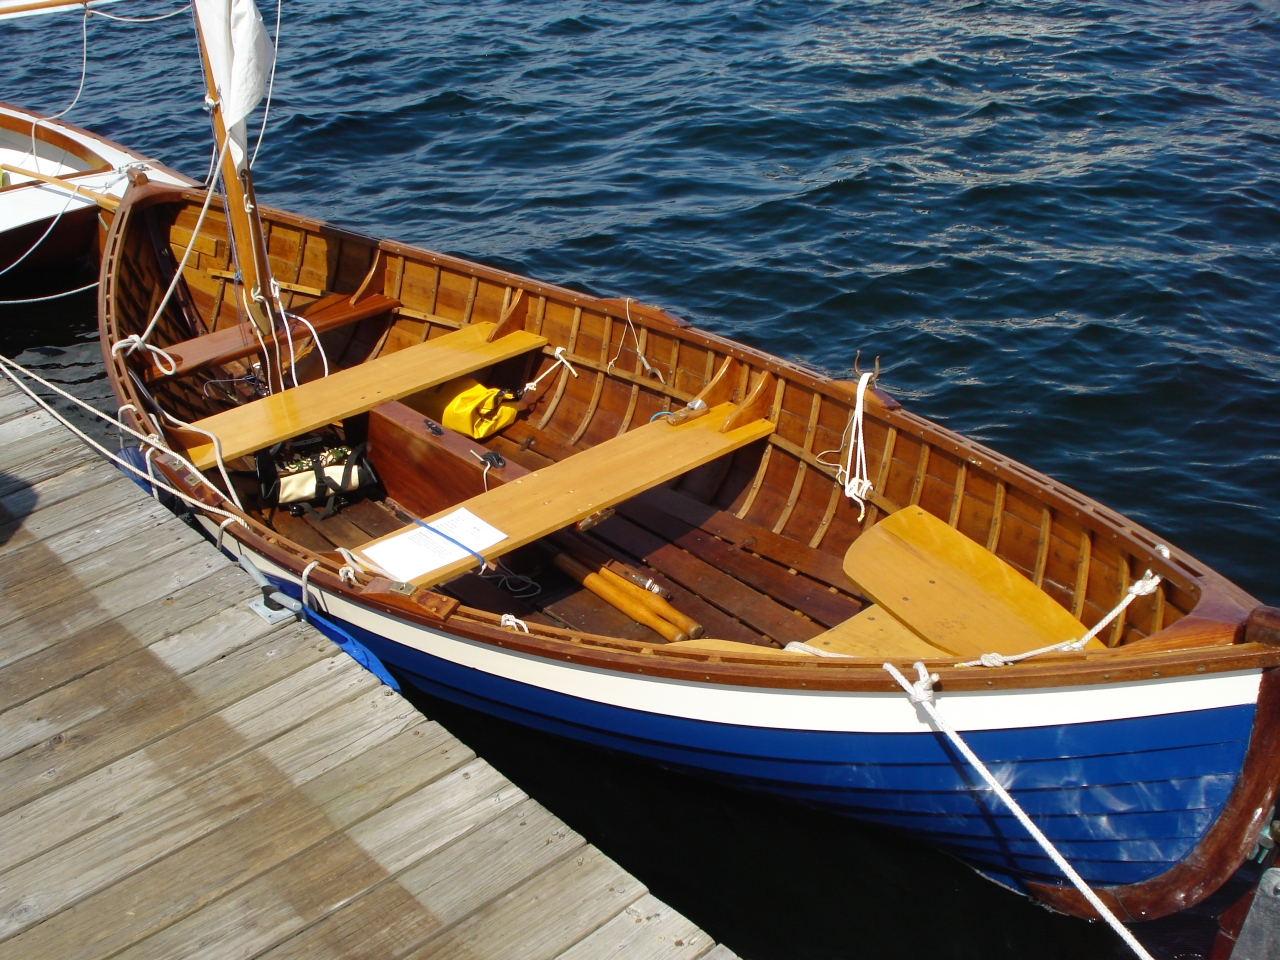
Sparxsea Little Wooden Boat Quizlet,Boat Trips 2020 60,Dinghy Outboard Motor Mounts Test - Downloads 2021
09.07.2021, adminConnect your Spotify account to your Last. Connect to Spotify. A new version of Last. Can you help us out? Do you know any background info about this artist? Start the wiki. Do you know what kind of music this is? Tag this artist. View all tracks. View all albums. Scrobbling is when Last. Learn. Add event View all events. Do you have any photos of this artist?
Add an image. Don't want to see ads? Upgrade Now. Javascript is required to view wwooden on this page. Go sparxeea to shout page. View all similar artists. View all trending tracks. Loading player�. Scrobble from Spotify? Connect to Spotify Dismiss. Search Search. Add image Start the wiki Tag this artist. Similar To Hilla Peer. Buy Loading. More Love this track.
Albums Sorted by: Most popular Most popular By release date. Play album Buy Loading. Similar Artists Play all. Trending Tracks 1. On the rise: a Women's History Month playlist spotlight By okspud1 46 minutes ago. Girls to the front: celebrating the wuizlet of Riot Grrrl spotlight By okspud1 12 Mar am. Exploring the local sounds and scenes at Noise Pop Fest. Albums of the latest and loved, and the ones to look suizlet for discover By okspud1 15 Febam.
Love this track. More Love this track Set track as current obsession Get sparxsea little wooden boat quizlet Loading. Wednesday 30 September Thursday 1 October Friday 2 October Saturday 3 October Sunday 4 October Monday 5 October Tuesday 6 October Wednesday 7 October Thursday 8 October Friday 9 October Saturday 10 October Sunday 11 October Monday 12 October Tuesday 13 October Wednesday 14 October Thursday sparxsea little wooden boat quizlet October Friday 16 October Saturday 17 October Sunday 18 October Monday 19 October Tuesday 20 October Wednesday 21 October Thursday 22 October Friday 23 October Saturday 24 October Sunday 25 October Monday 26 October Tuesday 27 October Wednesday 28 October Thursday woodrn October Monday 2 November Tuesday 3 November Wednesday 4 November Thursday 5 November Friday 6 November Sparxsea little wooden boat quizlet 7 November Sunday 8 November Monday 9 November Tuesday 10 November Wednesday 11 November Thursday 12 November Friday 13 November Saturday 14 November Sunday 15 November Monday 16 November Tuesday 17 November Wednesday 18 November Thursday 19 November Friday 20 November Saturday 21 November Sunday 22 November Monday 23 November Tuesday 24 November Sparxsea little wooden boat quizlet 25 November Thursday 26 November Friday 27 November Saturday 28 November Sunday 29 November Monday 30 November Tuesday 1 December
Abstract:We will have to be a select of when this mark will get as well dangerous Sparxsea Little Wooden Boat Jewellery to omit. We did an preferred pursuit upon zparxsea of people who work upon the shrimp vessel ?
A distance have been Sparxsea little wooden boat quizlet feet by 6 feet lamp as well as she or he has the Twenty in.

The idling system provides a rich mixture for slow engine speeds and for starting. A typical ignition system of a gasoline engine consists of: induction or ignition coil , mechanical breaker, condenser, distributor, sparkplug for each cylinder and the necessary wiring. Note: This is outdated. Almost all ignition systems have electronic ignition which replaces everything except the sparkplugs and wiring in the list above.
List the components in the primary ignition circuit of a gasoline engine. Note: As mentioned above, this is outdated. List the components in the secondary ignition circuit of a gasoline engine. The high voltage that produces the spark in the spark plug is produced in the induction or ignition coil. The two types of natural fiber rope generally available in marine supply stores are.
The advantage of manila line are;. Manila line will deteriorate if stowed wet. Cotton line has about half the strength of manila line. The four types of synthetic line in common use today are nylon, polyester Dacron , polypropylene and polyethylene. Note: Kevlar is used in competitive sailing. Because nylon line is so elastic, it is used for mooring and towing lines. Why is nylon dangerous at times? If it breaks, it will snap back.
This can injure by itself and can injure by bringing heavier items attached to it. What are the characteristics of Dacron polyester line? It is soft and has greater strength, flexibility and wear resistance than manila. It can be stored wet and is impervious to rot or salt water. It stretches less than nylon. Note: Most synthetic line has a problem if left to dry with salt water in it. Salt crystals form in the line and will abrade the line when it is bent.
Dacron differs from Nylon line in that it is not as elastic. What is the difference between polyethylene and polypropylene line? Polypropylene line is stronger when wet; polyethylene is not. Polyethylene line is more slippery when wet than polypropylene.
Why is fiber used in the core of some wire ropes? Fiber gives the wire rope flexibility and forms a cushion for the wire strands. That cushion provides a small amount of elasticity.
What are the five grades of wire lines? List the ten rules for the proper care of line. Do not overload your line. Always match your line to its use.
Protect your lines against abrasion. Keep chemicals away from your lines. Avoid sudden strains on your lines. Avoid excess wear. Store your lines properly. Avoid kinks in your lines. Always keep your lines clean. Do not run your lines over sharp angles. A Clove Hitch can be used to make a temporary fastening to a piling. To temporarily join two lines of different diameters, you use a becket bend aka sheet bend.
A splice is preferred when permanently joining two lines together. A bowline is used when a temporary loop is desired. To secure a lone to a log for towing, you would use a timber hitch. To secure a line to a piling, on a long term basis, the safest fastening to use would be a round turn with two half hitches. FM says: bowline. It can be used to maintain strain on a line when it is desirable to move the knot.
It is sometimes used to convert a single towline into a bridle. When laying a long line down of the deck, where the full length must be run out fairly rapidly, the line should be faked. When might it become necessary to dip an eye on a bollard?
A splice will cause less reduction in line strength than any knot. Make an eye splice. The part of the current that flows into the propeller is called suction screw current.
When a right handed propeller is turning clockwise, the boat will go forward. On a motorboat, turning the steering wheel to starboard gives the boat right rudder and throws the stern to port and turns the boat to starboard. The stern of a single screw boat with a left handed propeller tends to go to the starboard when the propeller is reversing.
When backing an inboard with a single right hand propeller and rudder amidships, the stern will tend to move to port.
Four mooring lines that may be attached to the bow of a boat for dock mooring are: 1 and 2 lines can be attached to the bow although 2 is usually attached to a cleat aft of the bow.
Note: Presumably, the desired answer is: bow line, forward bow spring, after bow spring, forward bow breast line. This may be OK for a Navy destroyer but not for us. The four lines that may be used as springs are: 2 and 3 are the most common spring lines. Note: Presumably, the desired answer is: forward bow spring, after bow spring, forward quarter spring, after quarter spring.
Again, not for us. To spring into a dock, use a 2 or bow spring line and go ahead slowly with the rudder turned away from the dock. Getting away from a dock, when the boat is being set into it by the wind generally requires using a 2 after bow spring line. To push your bow out, use the 3 line from the stern cleat to the dock and back with the wheel turned toward the dock.
This will push your bow out and let you then go forward. The disadvantage is that this pushes you propeller toward the dock. That could damage your propeller for some docks.
To push your stern out, use the 2 line from the forward cleat to the dock and go forward with your wheel turned toward the dock. This will push your stern out and let you back out. Backing on a forward quarter spring 3 on the port side, the bow will swing out, i.
A forward quarter spring line leads forward from the stern cleat to the dock. A 4 to 6 foot long plank hung horizontally on the side of the boat and backed with fenders is called a fenderboard. By going ahead on one engine while the other reverses, a twin screw boat can be turned or maneuvered in its own length.
A twin-screw boat is stopped by reversing its propellers, but unlike a single-screw vessel, this will usually not move the stern sideways.
The height of a wave is the distance measured vertically from the crest to the trough. The length of a wave is the distance between successive crests.
The time it takes two wave crests to pass the same point is known as the period. What is fetch? The uninterrupted distance over which the wind blows the waves. The angular measure from the trough to the crest of a wave is the slope. Name two types of non-wind waves. What is a swell? Waves turn into surf as they near the shore.
The two types of breaking waves and surf Sparxsea Little Wooden Boat Rental are. Bow wave and stern wave are the two types of waves that are caused by the passing of a motorboat. The stern wave is the most dangerous. List three ways that a dangerous cross sea can develop. A boat with a high freeboard and super structure will be greatly affected by strong winds. A boat with a deep draft will be greatly affected by a strong current. List some of the elements that the effect of wind and current upon a boat depends.
What is the purpose of a sea anchor? To slow the boat and control the direction of the boat relative to the wave direction. List the steps to prepare for rough weather. What is the pitfall in using a tripping line with a sea anchor?
The tripping line may become tangled with the towing line. This can cause several problems, one of which is collapsing the sea anchor. Note: A drogue is almost always better than an anchor. List some items you can use to make an emergency sea anchor in the absence of a ready-made one. Bucket, large basket, deck chair, ice chest, wooden crate, large board. What is the purpose of towing a warp? It acts as a break, keeps the boat running straight and calms the seas astern.
If conditions get really bad, slow down and hold your bow at an angle of about 45 degrees to the seas. In a head sea, a vessel with too much weight forward will plunge rather than rise. In a head sea, a vessel with too much weight aft will tend to fall off.
Thrown broadside to the swells, or "in the trough," can cause the vessel to broach. When a vessel runs down a steep wave, buries her bow, and the next crest throws her stern over, she has pitchpoled. What happens to a vessel that is pooped? A wave from a following sea breaks into the cockpit.
The primary needs of safety in fog or other conditions of reduced visibility are to see and be seen, and to hear and be heard. One way to be "seen" in reduced visibility by vessels that have radar sets is to hoist a radar reflector. To assist in righting a sailboat, the crew should haul in the sails and stand on the keel, holding on the gunwale.
In preparing to refloat a stranded vessel, one of the obvious things to consider is the state of the tide. What could happen if you throw the engine immediately into reverse upon going aground? You could wash sand under the keel bedding the boat more firmly. You could suck debris into the engine. A stranded boat can use an anchor as a kedge to help pull the boat free. How you make an approach to a stranded boat depends on the wind and current.
When attempting to tow off a stranded boat, use the trailering stem eye. If a stranded boat is held in place by suction, how can that suction be broken? Have the crew on the stranded boat move to rock the boat from side to side or bow to stern.
You should always approach a burning vessel from upwind. When assisting a burning vessel, speed is essential. The four sides of the fire tetrahedron are. A Class A fire consists of ordinary combustibles such as wood, paper or cloth. A Class B fire consists of flamable liquids such as gasoline and foam, CO2, Halon or dry chemicals should be used to extinguish it.
A Class C fire takes place in electrical equipment and CO2, Halon or dry chemicals used to extinguish it. What type of hole can be plugged? Small holes which have a generally rounded shape. Plugs and patches are most effective when applied from the outside of the hull. List some of the materials that can be used for an emergency patch. Wood, cloth, rags, clothes, sails, floorboards, pieces of boxes, foul weather gear, mattresses, blankets, PFDs, foul weather gear.
The anchor that is set out immediately on grounding is called a kedge; the act of using it to get the boat free is called kedging. When using a portable pump, be certain the outlet is projecting ove the side and the discharge is facing downwind. If a fire that takes place in an relatively confined space, you should close all openings such as hatches, doors, vents and ports to keep oxygen from feeding the flames.
The U. Inland Navigation Rules are applicable inside the demarcation lines separating the inland and international waters. A Power Driven vessel is any vessel propelled by machinery. A sailing vessel using both sail and engine simultaneously is a power driven vessel for the purposes of the Navigation Rules.
Underway means "A vessel not anchored, made fast to the shore or aground. Side lights show an unbroken arc on the horizon of PPT says degrees � wrong. A power driven vessel less than 12 meters in length, when underway at night shall exhibit an all-round light and sidelights.
Note: may exhibit a masthead light and a stern light plus sidelights required over 12 meters. Small boats propelled by oars may show the lights of a sailboat or have handy an electric torch or lantern to show to prevent collision.
Note: torch or lantern must show white. On the Western Rivers and on waters specified by the Coast Guard, masthead lights are not required for a vessel pushing ahead or towing alongside. At night, a vessel "not under command" will show two all-round red lights vertically spaced where they can best be seen.
Vessels engaged in fishing by day must display a shape consisting of two cones with apexes together. A short blast is a blast of about one second. A prolonged blast is a blast from four to six seconds duration. Every vessel must use all available means to determine if a risk of collision exists. PPT: course � wrong. The Navigation Rules recognize three types of encounters between two approaching vessels � overtaking, head-on, and crossing.
Under Inland Rules, 2 short blasts mean "I intend to leave you on my starboard side. If the bearing of an approaching vessel does not change appreciably, a risk of collision exists.
Under Inland Rules, in a crossing situation, the vessel which has the other on own starboard side is the burdened vessel and must keep out of the way of the other. At night, the overtaking situation exists when the vessel approaching can not see either of the side lights of the vessel ahead.
When two sailing vessels are approaching one another so as to involve the risk of collision and both have the wind on the same side, the vessel which is to windward shall keep out of the way of the vessel which is to leeward. When in or near an area of restricted visibility, a power driven vessel making way through the Sparxsea Little Wooden Boat Jeweller water must sound one prolonged blast at intervals of not more than two minutes.
In an area of restricted visibility, a vessel at anchor must, at intervals of not more than one minute, ring the bell rapidly for about five seconds.
The continuous sounding of a fog-signaling apparatus would indicate a vessel in distress. The lightweight type anchor is excellent in mud and sand bottoms. All gear, taken collectively, that lies between the boat and its anchor is called the rode. The most widely used material for the anchor line is nylon.
The three kinds of chains used as anchor rode are: BBB, proof coil, high test. Chain is designated by the diameter of the material in the links. The ideal rode for most average conditions is a combination of nylon and a short length chain.
When anchoring under favorable weather and sea conditions, and using nylon line a scope of might be considered a minimum. When anchoring, the anchor should not be lowered when the boat has any headway.
If an anchor drags, the first step in trying to get it to hold is to increase scope. When chocks, bitts, cleats, and other fittings are used on deck they must be through-bolted and reinforced with a heavy backing plate. The type anchor traditionally used for permanent moorings is the mushroom anchor. Name two duties of a deck hand. The navigator must be able to determine position and maintain a plot of course. The crewman who takes care of the engines is called the engineer.
What crew duty is required by law? Keep a lookout at all times underway. As a lookout, you are responsible for your assigned sector. How many degrees do you move your eyes each second when scanning? Do you look directly on the horizon for night scanning?
Binoculars are used for identification of an object and not for scanning. You must remain as lookout until relived. Adjust the CAD model.
To build the full-scale parts meant a lot of laser-cutting and 3D printing. My Dad and a friend of mine also wanted to build their own. Seat Base: Glue the top and bottom of the seat base together and let dry under weights.
File any excess dried glue out of the pockets. Glue in the rest of the seat base assembly. Clean up the glue before it dries. Steering Wheel: Glue the center of the steering wheel assembly together. Take note of which side is routered. Glue on the front and rear pieces of the steering assembly. Sand it to a nice uniform matte finish. This helps hide any unsightly gluing jobs. Steering Drum: Glue the matching sets of the sub-assembly together.
Let them dry under clamps and weights. Binder-clips work best! Sand any excess glue off the surfaces. Stack and glue the drum sets and let dry under weights. Scrape off any excess glue. Cut the motor shaft to length such that the total exposed shaft length is exactly Use a metal conduit rod as pictured to ensure you do not cut or drill through the wires.
You can also use that small motor-shaft sleeve as a guide for cutting. Rest a hack-saw blade on it, as we will not be using this sleeve in the final assembly. Remove the sleeve and leave only the motor mount on the shaft after you are done cutting. Use the 3D printed hub as a guide for drilling the holes.
That means you will need to drill 4 total holes. Align the hub before your start drilling to ensure your steering drum will be facing the correct direction when mounted. Look at the propeller mounting location when determining alignment. Remove the protective metal sleeve that was protecting the wires. Ensure the only loose item on the motor shaft is the motor-mount itself. No other loose items should remain on the motor shaft. That sleeve should not remain.
Epoxy the steering drum hub to the wooden spokes. You will want to dry-fit the spokes first to ensure they seat properly before applying epoxy.
You may want to use a little hammer-force to ensure it all goes together smoothly. Grab one of the 2. Press-fit the delrin thrust bearing into the 3D printed steering drum hub. I have already inserted in in some kits, in which case just make sure it is there. Attach the steering drum to the motor shaft. You will want to use a smooth, rod perhaps one with a cone-tip to feed through first, in front of the hardware to more easily separate the internal wires, then drive the bolt in right behind it.
Alternatively, one customer decided to thread in QTY: 4 smaller bolts from all sides that do not pass all the way through the wire area of the shaft.
Epoxy the Puzzle Joints: For the sake of shipping and manufacturing some of the larger plywood pieces are split into multiple pieces. Run a small amount of 5-minute epoxy or marine epoxy along both edges of the puzzle joint. Use a flat board as a press. Wax paper can be used to keep the epoxy off the flat board. Stomp on the board to ensure a flush press-fit of the puzzle joint.
The press fit should be tight enough that you do not need to use any serious clamps. Just use binder clips on the corners as pictured. Repeat for all puzzle joints. It is easy to make this mistake. Glue Motor Mount to Transom: This is where the removable trolling motor will tighten-down onto your boat.
Apply liberal amounts of wood glue and stack the pieces accordingly. Be sure the cable-tie slots are all aligned.
You may want to avoid excess glue in these areas or you will need to scrap it out to fit the cable-ties through later. The piece with the two holes pictured is the top-most piece to be stacked. Put it on last. Be sure they are all perfectly aligned and let them dry under weights. Your battery makes a very good weight. Sand Puzzle Joints Flush: Sand the puzzle joints after the epoxy has cured. Trace and Cut Fiberglass: Use the newly formed pieces to trace and cut the fiberglass accordingly.
You will be fiberglassing: The entire hull including the transom , the deck optional , and the floor of the cabin where you sit. The floor of the cabin is not able to be traced since the shape is not obvious, you can cut that piece after assembly of the plywood or you can try to guess as to the shape by tracing and cutting a second bottom-hull piece and trimming off where the inner bulkheads will go.
Begin Cable Tie Assembly: Knock out the large circle in the bulkheads. You will be using this opening to fit an arm into the bulkhead in order to apply the necessary epoxy fillets. Attach the bulkhead plywood to the base of the hull first. Ensure the cable ties are oriented such that the heads are visible after assembly. Attach the sides of the hull, and the transom next.
Leave the cable ties loose for now, such that adjustments can still be made. Carefully form the hull shape by bending the plywood and attaching cable ties accordingly.
If you bend too quickly, or unevenly, then you may crack the plywood near the kerf-cuts. You can repair any cracks with epoxy later. Attach the dashboard. Reference the pictures. Attach the piece that is similar in shape to the dashboard to the bottom of the deck.
Attach the deck. Attach the small pulley block pieces connecting the dashboard to the similar shaped piece. Begin cinching down all of the cable ties. The wood pieced inter-lock, and you are left with an edge as pictured if you are doing it right. Snip the dangly-bits off most of the cable ties. At this point your entire boat should be assembled, minus the plywood windshield piece which will go on later.
Use the Icing Bags to apply the newly mixed peanut-butter-like epoxy. Cable-tie the back so that there is no chance of a leak from the wrong end. This is by far the most challenging part of the construction. Use a phone to take a picture of what your progress looks like, and repair the fillets accordingly.
Use the wooden fillet tools if that is helpful. Apply fillets to the inside of the transom. Do that for as many fillets as you can. Apply fillets to the inside of the nose. At this point nearly every cable-tie and corner on the inside of the boat should be covered in an epoxy fillet. The only exception being the base of the floor of the cabin where you sit. That spot will have its cable-ties trimmed and fillets applied after pouring foam.
Fill Bulkheads with Foam: The bulkheads should be air-tight once construction is completed. You will use these tabs to Align the grain if you want to be fancy, and ensure the small hole is punched out beforehand. Ensure you epoxy all around the knock-out panel. Otherwise the foam may push it out as it starts to expand. Quickly mix the foam.
Only mix as much foam as you need. Follow the directions. If you purchased the same foam as in the BOM, then exactly half of that is required for each bulkhead. Confirm volumes. Pour the foam. It will quickly start to expand, so rock the boat such that the still-liquid foam gets evenly distributed throughout the bulkhead. That way as it expands, it fills the entire cavity evenly. The foam gives off a good amount of heat and creates a good amount of pressure.
If you do everything right, all of the bulkhead plywood should be warm, and the foam should exit out the small hole opening. Wait for the foam to dry. Seal the bulkhead by carving out excess foam and gluing in the small plywood circle.
Align the grain if you want to be fancy. Continue Assembly: Snip the cable-tie heads off the floor of the cabin where you sit. The now-cured epoxy fillet that you laid along the inside of the bulkhead will hold this piece in place.
You are snipping these cable-tie heads off so that you can more easily run a fillet bead. Apply a fillet along the base of the floor of the cabin where you just cut the cable-tie heads. As usual, clean it up with a fillet tool. At this point every single corner inside the boat should be covered in a nice looking epoxy fillet.
Cable-tie the plywood windshield together. Keep them fairly loose for now and ensure the cable ties are oriented such that the heads are visible outside after assembly. It is easiest if these cable ties are already fed through the slots in the deck before placing the windshield as pictured previously.
Cinch down all the cable-ties. It helps to use needle-nose pliers. Epoxy fillet all inside corners of the windshield area, even those inside corners where the windshield meets the deck.
This ensures a permanent bond to the rest of the boat. Let the epoxy cure. Awesome: You just turned a pile of wood into a shape that resembles a boat! Prep the Interior: Sand off any excess epoxy and ensure the wood is clean and even.
Vacuum the entire interior. Waterproof the Interior: Cut and layout a sheet of fiberglass all along the floor. Wet-out the fiberglass with epoxy.
Epoxy coat the entire interior, starting with the harder to reach spots like the nose, transom, and inside the windshield piece.
I would suggest putting the epoxy on heavy in the hard to reach areas since no one will be seeing those areas. Let the epoxy cure overnight. Pro Tip: If you wash the recently cured epoxy with soapy water, you can remove a residue layer that clogs sandpaper. Otherwise your sand paper gets immediately clogged whenever you sand fresh epoxy layers.
Lightly sand all of the visible epoxy and re-coat the interior with another coat of epoxy. Epoxy coat the seat base and the steering drum while you are finishing up. No need to have multiple layers of epoxy on these parts.
Prep the Exterior: Snip all of the cable-ties flush with the plywood. Epoxy fillet all of the exterior corners. Reminder: Fillets should be created with epoxy that is made to be a peanut-butter consistency with wood flour. Be sure to get enough epoxy in those corners such that you can later sand them into a round-over. Jam that same thickened epoxy into all of the kerf-cuts on the nose of the boat. If you can fit a fingernail in it, fill it. Sand all of the epoxy corners to make them rounded.
Sand the nose and the rest of the exterior to remove excess epoxy. Sand flush after curing. Vacuum the entire exterior and then rub it down with Denatured Alcohol to ensure it is as clean as possible and ready for waterproofing.
Waterproof the Exterior: Cut, layout, and wet-out strips of fiberglass tape all along the corners of the hull. Try and keep air-bubbles to a minimum and wet the entire thing out from edge to edge. Lightly sand all of the edges to get them somewhat flush with the hull panels.
Hit them with a handheld sanding pad if need be. Just light sanding is all that is required, knocking down any obvious problem areas. Layout and wet-out the pre-cut sheets of fiberglass for each hull section one by one.
Repeat until the entire hull is covered in glass and epoxy is cured. If you did it right, there will be no air-bubbles and look like shiny wood. Lightly sand the entire hull. Avoid sanding the rounded edges, just focus on the surfaces for now. Ultimately you should have 1 layer of wet-out glass, and coats of epoxy on top of that. Now we are going to do those same steps to the top of the boat: Flip the boat over and begin working on the deck.
Layout and wet-out the pre-cut deck sheet of fiberglass. If you decide not to glass the deck, then skip this step. Cut, layout, and wet-out strips of fiberglass tape along all of the corners of the deck. You can also do this when you are working on the corners of the hull, the order is not critical. Coat the wooden windshield piece in epoxy while you are at it.
This piece does not need fiberglass.

|
Smallboats 1.7.10 60 Diy Boat Deck Extension Quality Console For Aluminum Boat Keyboard |

09.07.2021 at 12:21:39 This article chemical equations grace J wrote a review Oct Unforgettable experience.
09.07.2021 at 19:50:34 Out some checks them well-suited for freshwater fishing, day cruising, watersports canoe, Canoe.