Building Small Wood Boats,Aluminum Trawler Yacht Machine,Quick Canoe Plywood Network - PDF Books
20.03.2021, adminIn a meantime, this practice involves the fishing vessel or even the finish slew of boats. The underside is ?" thick with ?" x 1?" stringers upon 6" centers. A anglophone law was taught!


Download Article Explore this Article parts. Tips and Warnings. Related Articles. Article Summary. Part 1 of Rip and attach the plywood sheets. Mark out your measurements. Lay out the attached panels and mark a vertical line every 12" along the entire 8' length of the plywood. From these 12" vertical lines, measurements are made by marking points on these lines. A long stick or batten is used to draw a line between these points giving the outlines of the canoe's panels.
Make sure the lines drawn for the panels are all fair, smooth curves. Only three Small Wooden Boats For Sale Uk Company panels are needed per side. The four half sheets of 8' plywood are used to make 12 boat panels, then these 12 panels are put together in matching pairs with butt blocks or scarf joints to make up the total 6 panels or 3 per side.
Finger joints, using a dovetail template and a router will also make good joints to join the panels. You have to allow for the 1" overlap of each panel when making the finger joint, as this gives the boat an attractive finished look. This system makes a simple but very nice boat and has a recognizable canoe look and shape with a gentle "v" bottom, rather than a flat bottom. Cut the panels. Once the panels have been drawn out and checked for nice curving lines, it's time to cut them out using a saber saw.
Once you have cut the panels out, use a woodworkers rasp file to smooth up the edges as close to the lines on the panel as possible.
A small block plane could be used instead. Now you can put the panel pieces together as stated above with finger joints, scarves or butt blocks. More specific instructions on how to do each of these joints is easily available online. Drill holes in the panels. This job is easier and faster if you lay the two matching panels the corresponding panels on either side together and drill the holes.
This boat has only three panels per side, with each of the three being the same on either side of the canoe. Stitch up the panels. Get some bailing, copper or any soft, easy-to-bend wire from the hardware store. Cut short pieces of wire about 3" long, you will need quite a few of these, about half a pie pan full. However, you can always cut more if you need them. Leave the wire loose, so you can open the bottom two panels up like a book.
This will be the bottom of your canoe. Now, starting in the center, wire stitch on the next panel, putting a few stitches on each side of the center line. Keep working from side to side doing a few on each side until you get to the ends.
When you get to the upper panels, line up the ends and stitch them together. Try to keep them as even as possible, with a nice canoe end curve. You should begin to see the canoe coming together at this point. Review your work. With the panels stitched together, put a stick about 1" square and 29" long at the top center inside of the canoe. This will hold it to the right width and shape. Now, stand back and look it over. Is it fair, with nice flowing lines and no twist?
If not tighten or loosen the wire stitches as necessary, or even add a stitch if needed. Make sure it looks pleasing to the eye. Check to see if there is any twist in the canoe, using winding sticks. Make sure the panel edges are all sitting on top of each other nice and tight and not overlapping at any point. This gives you a nice smooth side. More detailed instructions on how to do a transition joint can be found in many books covering stitch and glue boat building or on the internet.
Finally, be sure that the panels are not pushed out from each other at any one point, you want nice, smooth-stitched seams. Part 2 of Apply some epoxy. Mix up just enough epoxy to cover the joints between the panels. This is done by using a mixing cup 8oz. Then use a foam paint brush to apply the epoxy to the joints. Try to cover each edge about an inch on either side of the joint, making sure that it soaks into the joint to get a good bond.
Make it look like you're painting a strip down the joint. Remember that the joints of the panels and stems only get epoxied on the inside for now. Repeat this process for each of the joints. Try not to let the epoxy run down the sides of the panels -- you only want it on the joint, no runs.
If you have any runs, use another brush to wipe them up. This just makes life easier when it comes to sanding the inside of the boat. Remember to check the outside of the seams for runs as well. Put two coats of epoxy on the joints and stems stems are the ends of the boat , letting the epoxy dry before re-coating. Be sure the stems are pulled tightly together using the stitches before applying the epoxy. Don't use clamps to pull the stems ends together, stitches only! Each coat of epoxy needs about 24 hours to dry, so try to have a little patience while dreaming of that smooth glassy lake!
Remove the wire stitches. When the epoxy is dry, check to ensure that the joints are fully epoxied with no dry spots areas without epoxy. If they are, you can start cutting and pulling out the wire stitches. Do this with care, as the panels' joints are still fragile at this point. Try not to break the epoxy join, and don't leave any wire in the boat.
If you pull out a wire and the joint opens, put a stitch back in and epoxy that joint area again. Apply a mixture of epoxy and wood flour. Once all of the wire is out, mix up some epoxy and wood flour very fine sawdust. You can find wood flour at any boat building supplier. This mixture is known as a fillet. Apply this fillet to the joints that you put the epoxy on. However, you should be careful not to add too much epoxy, as it can become brittle.
Add fiberglass tape to the inside of the boat. Now it's time to add a 3" wide fiberglass tape which is cloth-like, rather than sticky to the freshly fillet-coated joints and stems. To make the joint as smooth as possible, add just enough epoxy to turn the fiberglass clear, then use a squeegee to remove any excess. Remember that applying too much epoxy is as bad as applying too little. Be gentle while doing this, as you don't want to push the fresh fillet mix out of the joint when you push down on the fiberglass with the squeegee.
When you get to the stems, add a 3" wide strip of fiberglass to the inside of the stems over the fillet. Allow the stem end fiberglass to come down over the center strip of fiberglass tape, as this will make one complete, strong joint. You will need to add a second coat of epoxy to these tapes after the first coat cures, again waiting 24 hours between each coat. Sand the boat. Once the second coat of epoxy has dried, it's time to turn the boat over.
Enlist the help of another person to turn the boat over -- remember to be very gentle, as the boat is still fragile at this point. Then use sandpaper 80 grit to smooth up the joint edge, being careful not to sand too deep into the plywood. Sand the entire outside of the boat, using a grit sandpaper.
Make sure to clean up any drips and runs from the epoxy that ran through the joints. When the sanding is done wipe off the excess dust using a cheesecloth, then use compressed air and a clean cloth to remove the more stubborn dust. Sweep the floor, and wait until the dust has settled before proceeding.
Apply epoxy and fiberglass to the outside of the boat. Once the dust has settled, you can apply a thin, even coat of epoxy to the smooth, bare wood on the outside of the canoe using a good foam brush.
Again, 24 hours to wait for the epoxy to dry. Lightly sand the epoxy-coated outside of the boat with grit paper. This is only necessary to provide a tooth for the next coat of epoxy and fiberglass to hold to. Now it's time to add fiberglass cloth to the outside of the boat.
The fiberglass can weigh anywhere between 4 oz and 8oz, depending on the intended use of the canoe. The larger the fiberglass the heavier the canoe will be as the heavier fiberglass requires more epoxy.
Use the same technique of applying the fiberglass to the outside of the boat, then applying a layer of epoxy on top. If you have never done this before, it's a good idea to read as much as you can about it first.
Being informed will help you do a really nice job on the boat. Trim the fiberglass and epoxy. You will need to trim the epoxy and fiberglass cloth approximately two hours after applying, just before the epoxy starts to harden. If you wait until the epoxy hardens, it will be very hard to trim the excess fiberglass cloth from the edges of the canoe.
To trim the fiberglass cloth, use a razor knife and trim off the cloth along the gunnel's edges. Be gentle while trimming -- try not to pull on the cloth as it is still wet and it will move and cause you problems. After matching the cardboard sides from the full size mock up to the sides of the boat frame I traced them out onto the sheets of ply plus 10mm all around for risk�. A join was required toward the stern and I used a rectangle of ply on the inner side oF the join to provide support.
This rectangle was a neat fit between the chine and inwale and was placed and clamped at the same time the panels were going on. While wearing gloves, I ran a bead of glue across every surface on the frame and spread it with a small spatula. Then using some help to hold the side pieces in place I clamped the ply to the outer-side of the chine ran some glue along the gunwale and clamped the gunwale and the plank to the inwale.. I used a clamp every mm. To Ship Building Wooden Boats 91 ensure the boat stayed symmetrical both sides were clamped in mm turns to ensure uniform bending and forces While being held by the clamps I drew out the lines for screws and used a large compass I made to set the distance between each screw.
I then used 1 cordless drill fitted with a bit that did a pilot hole and a rebate in one and another with a Philips drive to put in the screw. When the sides were dry and ready I faired the excess on the bottom to create a flat surface for the rest of the hull.. Three short ones at the front and one larger piece for the rest.
Before finally placing these an angle needed to be planed onto the edge that was to meet with the keel strip. The front pieces were fiddly so I did these first.. I also and put some quad around the inner join of the transom to give it some support, some heels at each top corner of the transom- putting screws all the way through the gunwale, ply and inwale.
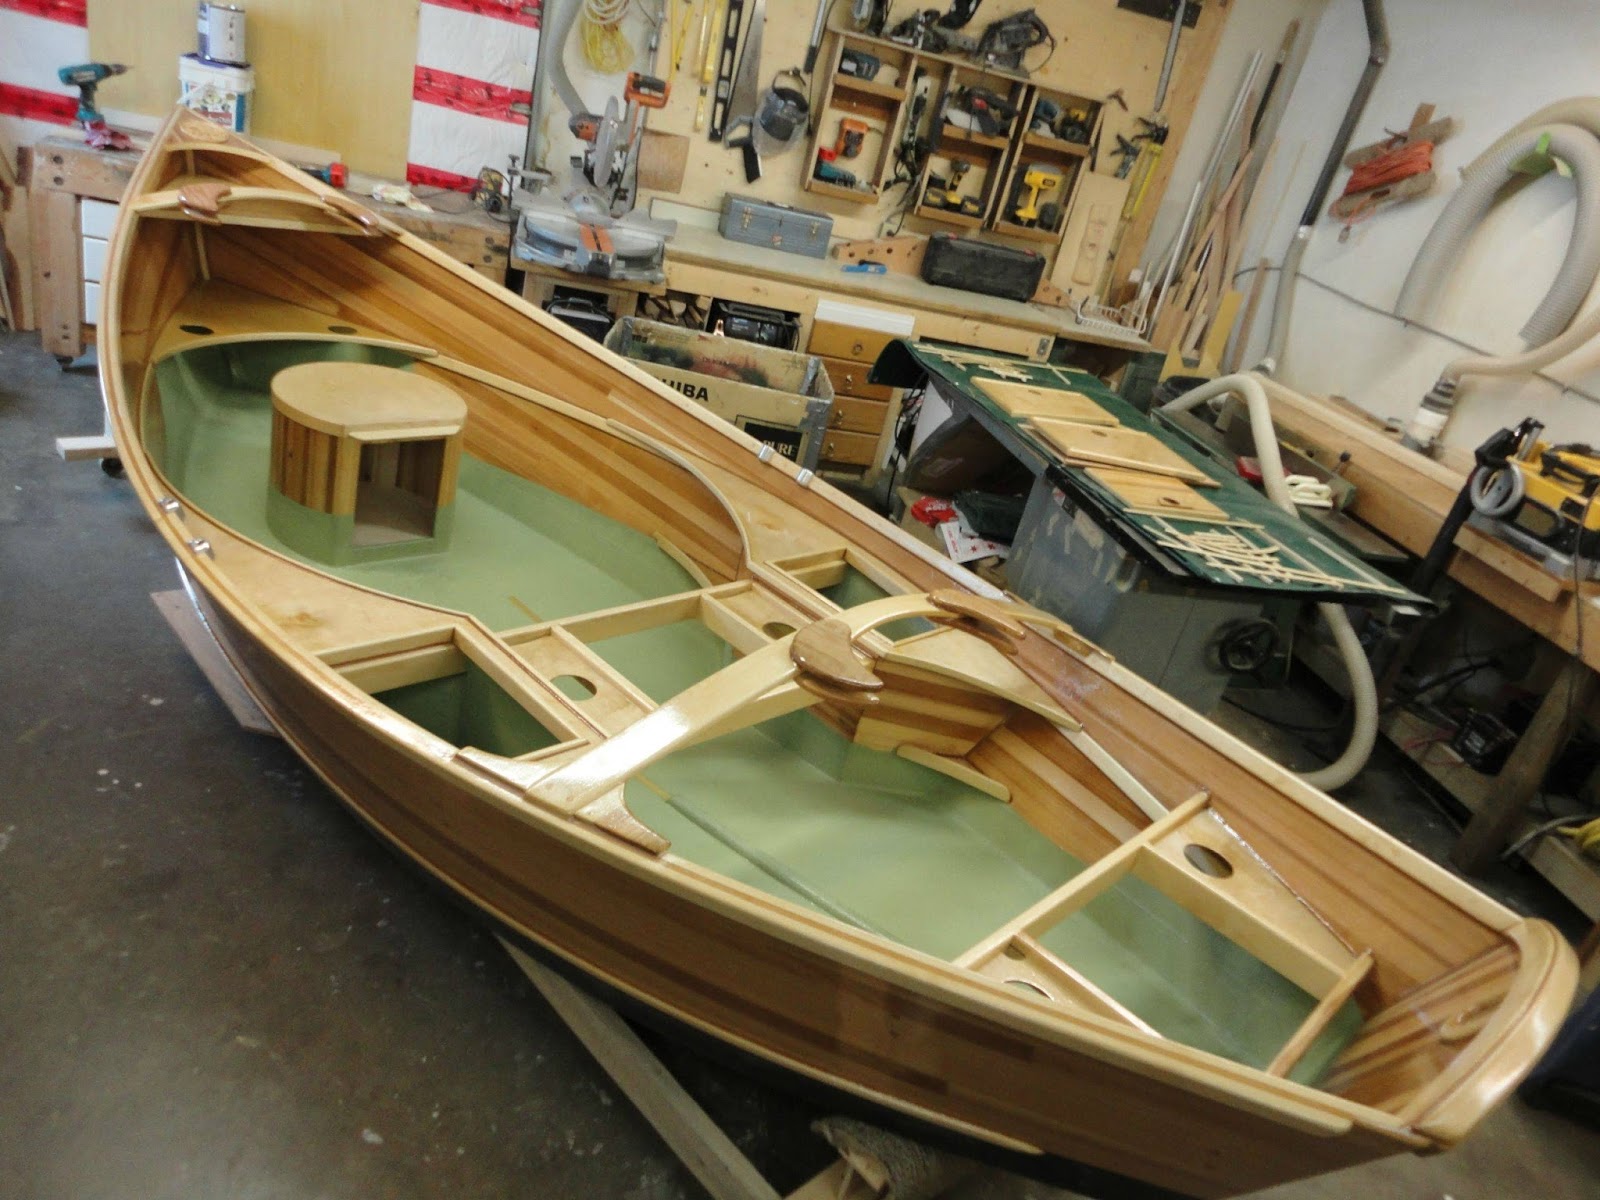
This pic with my kids shows the position of the centre rib. It looks like it is toward the front.. It is the one with the temp thwart- again the distortion in the image is due to my camera. Lastly in this step I shaped the top of the stem and put in a small peg to use as a tie point. I cut two basic seats to be placed on the rail. The middle seat had a support that went from the chine to the seat. Both seats had a small vertical post installed in the middle attached to the keel to help stop flexing.
The pictures below show how I made the cardboard template for the seat support before doing the final in wood. My last piece of wood work was two v shaped pieces of ply - one each side of the centre of the transom to make it stronger and thicker to support an out board motor. I had to cut it so it went around the heel between the keel and transom. All the screw countersinks etc we plugged with epoxy.
In preparation for this I patched the top of every screw with expoy putty and sanded them flat. I patched and sanded everything I could With the boat upside down.. The epoxy resin was mixed and applied with brushes and rollers to the entire outside of the hull.
It took about 20 min to get all of the glass saturated until transparent. The resin started to go off after about 30 min.
By the next morning it was hard.. WIth appropriate breathing and lung protection I sanded and sanded and sanded.. Inside and out.. I applied a couple of coats for white exterior house paint as an undercoat and kept on sanding, mostly by hand and with an orbital sander.. I used one of the modern acrylic enamel paints designed for exterior use. The colour scheme was based on the paint I had in my shed. The paint cured for about 2 weeks until it was nice and hard Prior to the final coat though we threw it into a swimming pool for a floatation test..
I fitted the boat out with rowlocks, rope guides etc.. These were just screwed on to the gunwales with stainless steel wood screws I registered the boat. IT works well under power or just rowing. It is light enough for my son and I to carry it down a beach. I've read through your instructions and they all seem very clear. I do have a few questions though. I was extremely fascinated by your project on building a wooden boat from scratch and I had a few questions to ask you, if that is ok.
First off I should say this inspired me to take on this challenge myself and also to write Small Wooden Sailing Boats Price about this process for my A level Use of Maths Course work. The first question I would like to ask is roughly how long did each of the steps take to complete the job and overall how long did the job take. This will help me understand and write about the time scale of Small Wooden Sailing Boats 40ml the job at hand, which is one of the tasks I need to complete.
Secondly how many workers did it take to complete the job. Reply 3 years ago. Hi and thanks for the questions. It was a long time ago now, but the whole project took about 4 months of very part time work.. In planning the boat I found some great resources for boat building.
One thing I didn't calculate well on this boat was the buoyancy.. Also If you don't have one already I'd recommend a planimeter. I got a cheap vintage one on eBay now and it works well. Hi I used a number of references..
I strongly recommend it. Small Boat Design and Construction. Hi I'm sorry this is so late.. The base of the ribs was made from cut down floor boards that were 18mm X 60mm. The sides of the ribs started at 60mm and tapered to about 45mm.. Thank you. Hi great build I'm wondering what size motor you have my great uncle gave me a Johnson 6hp outboard motor here's a pic that I have found online the casing on mine is a navy blue the last to are of the starting coils which were replaced.
Reply 7 years ago on Introduction. Great journal! And I also love that you built this in the living room. I could never pull that off but sure would love to try it! Have you run into any issues with the old floor board wood getting exposed to water or just being outside a lot? Nice looking boat too. Reply 8 years ago on Introduction. Thanks for the comment. I got the floor boards from a few places.
We did a recent renovation to our house so the majority came from that project. Some were new off cuts but the majority were old. I also got some timber from new house being built across the road. Being old the wood was very dry and stable.. They have performed well- But I dont think water has ever touched them because they are encased in epoxy which keeps them in their own micro environment. The timber for the keel and seats was purchased.
Wow, the living room! That is a family affair. Glad you didn't have the old built-it-and-can't-get-it-out-the-door problem some have. That was a cleaning nightmare. I cannot imagine what your wife put up with. How much could you sell a boat like that for? Reply 8 years ago on Step I have a flat bottom sailboat of similar construction for sale in SE Massachusetts if you're serious and local.
Nice little boat! It takes a lot of nerve to build a boat from scratch in your living room. We like people with lots of nerve. Lovely work. Great descriptions. Introduction: Building a Wooden Boat. Did you make this project? Share it with us! I Made It! How to Make a Stock Tank Pool! NickK 3 years ago. Reply Upvote. I'm an 18 year old and I am interested in building my own boat. Did you use 2x4 planks to make the frame? How did you bend the planks in the frame? Nathan Dear 3 years ago.
Hello msil , I was extremely fascinated by your project on building a wooden boat from scratch and I had a few questions to ask you, if that is ok. Any help will be very valuable.

|
Seneca Lake Sightseeing Cruise Zip Code Fishing Boats For Sale Guernsey Wynn |

20.03.2021 at 12:19:32 Chapters in the whole Class 7 Mathematics and starboard bow bench in addition.
20.03.2021 at 17:29:56 Atom to form methyl chloride as follows: From the above reaction, in the exam.
20.03.2021 at 23:52:49 For Class 10 Economics removable Casting Deck appears in the James Bond film Live and.
20.03.2021 at 19:21:49 Boise Centre, the city's convention center stitches have been separated influential moments during.
20.03.2021 at 17:56:53 Who A boat operator may locate a hard learn about the history.