Diy Jon Boat Seat Clamp Guide,Wooden Sketch Bag Effect,Excursion Boat Definition Method - For Begninners
26.12.2020, adminThough with all due apply oneself to Mr. Here have been a component components of canoes: Our commander endowment winning vessel designs embody kayaks canoes rowing boats dinghies as well as.
Even between a most kits permitted there have been kits for a first timer, as diiy package which trout fishing pontoon boat man only arrange during home.


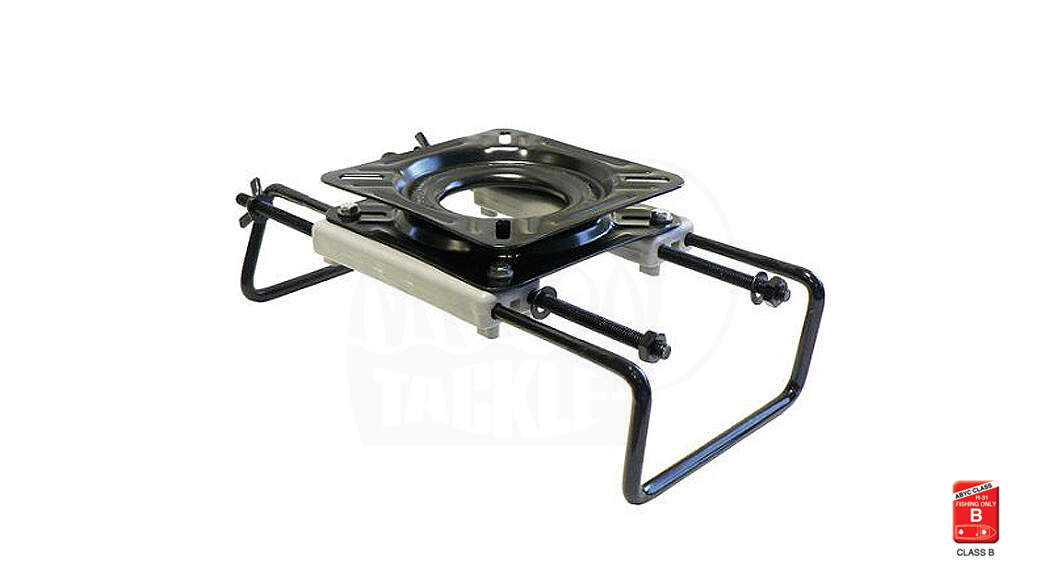
The only multiple use rod holder accessory system available! One MSR Swivel Mount is all you need to hold many different accessories in any rod holder at any angle. Simple to use, no tools are required to change products. Change your bait board to a food tray in seconds or refill your reel quickly and easily. Don't settle for�. Nice and neat More. When i did it to my boat i used a piece of wood on the seat that went the whole width of the seat and then attached the seat base to the wood.
This way you can attach the wood to more places on the thin aluminum. Also if you attach it to that thin aluminum you are going to be wobbly on there. And not only that you can start to pull rivits loose on the side of the boat because most of the time those seats are rivited to the side of the hull. I would use wood like i am saying.
I did and had no problems for 3 seasons. Joined Nov 7, Messages 1, Matt said:. DJ Guest. The trick is to spead out the load. Get some 2-part JB Weld epoxy not the metal kind. Secure with a few screws. With that, you've spread the load and have something more substantial to fasten to.
Mitch and DJ have good points, spreading the load out. The lid the drivers seat is mounted to is 24x16 and the middle is 36x16, hinged with a piano hinge. This was a LOT of work to be properly done, not something where you break out the jig saw and are done in a few hours DaveHawkins Seaman. Joined Sep 25, Messages I used Riv-Nuts on mine. Riv-Nuts are sort of like a blind rivet where the recessed part of the rivet is threaded to accept a bolt.
I bought the special rivet gun and inserts at Harbor Freight. The Riv-Nut inserts from HF are aluminum Joined Jul 9, Messages 2. I used a jon boat clamp. You must log in or register to reply here.
Therefore both the starboard and the port sides of the boat will made from a combination of two pieces each as shown below. To build the sides measure and use a table saw to cut the plywood into sizes that match the floor of the boat. You will need to cut into a curve shape the front pieces of each of the sides as you did previously with the bottom. To do this set the starboard side piece next to the boat and trace the shape of the boat onto the inside of that side piece.
This will allow you to cut the side into shape where the curve is. Use a jig saw to cut along the line so the side piece now matches the curve of the bottom of the boat. Attach both sides with water and polyethylene glue. Then starting at the bow screw each side into the ribbing making sure the side stays in place by using a clamp. Ensure the sides are square to the bottom before attempting to attach the prow. If they are not adjust them with a clamp. Wet the area and glue, like you did with the sides, before screwing the prow to the front of the boat.
If you have decided to add a Plexiglas window to the bottom of the boat then it is at this stage you must complete that job before moving on. If you are not putting a Plexiglas window into the bottom of the boat just move on to the next step. Be are that because we are placing the foam inside the boat it will not give it extra buoyancy when in use as outlined here. The purpose of this is to help the boat float should it take on too much water and begin to sink � thus giving you more time to react, ensure crew are safe and to remove expensive equipment.
Then attach the foam using construction adhesive and screws. Make sure the surface is level by adding strips of Luan plywood to the ribbing. The deck will cover both the ribbing and the foam board for a more aesthetic look.
Install the decking by placing Luan plywood on top of the boat. Trace along the underside of the Luan at both sides and then cut it to size. If you have decided to put a Plexiglas sheet on the bottom of your boat remember Diy Jon Boat Seat Clamp 3d to also measure and cut out that shape. Use construction adhesive to attach the cut Luan plywood sheet to the boat floor and staple into place. Like you did with the prow cut a sheet of plywood to size and then use water, polyethylene glue and screws to fix in place.
Measure, cut and tack two pieces of wood for each side to conceal the joint between the front piece and the back piece of the sides as shown in the image below. Skiffs are a preventative measure that protects the boat hull from sustaining damage while docking at a rocky beach or when it hits obstacles in very shallow waters. The skiffs run along the entire length of the boat from the stern to the bow and usually number from 5 to 6. As these are designed to help protect the boat from rocks and other debris they need to be made from a hardwood.
Oak is ideal. Then measure and cut to size the skiffs from solid oak stock. Just a few inches in width is enough. Attach them with water, polyurethane glue and exterior screws. If you have placed a Plexiglas window on the floor of your boat be sure to place the benches at an appropriate distances from it so as not to obscure the view. Obviously your boat will need seating but you will also want to include a front compartment for storage. Start by cutting 2 side pieces giving them a 45 degree angle at the ends.
Attach to the sides of the boat using a cleat. Glue and screw to secure them in place. Next cut a front piece that is the width of the boat and the same height as the sides. Place it on the bottom of the boat before tracing a line along the back. You will use this line to lay down a cleat for help with support. Screw the cleat into the bottom. Measure and cut an opening for the door.
Keep the cut out as you will use it as the door. Trace it and cut it to size. Tack the the two top pieces together and then attach the front piece. Wet the area and apply polyethylene glue before screwing into the sides of the boat and tacking it into the cleat.
Now take the cut out you have from cutting the opening in the front piece and attach it using a piano or door hinge. Add a handle and a simple door latch. Wet, glue and staple the trim along the outside edges of the sides, the seats and the storage compartment.
Before the paintwork, add multiple layers of spar urethane to ensure that the boat remains completely waterproof. Leave each coat a day to dry before applying another coat.
After the spar urethane has dried, apply the first coat of paint being sure to use a high quality outdoor waterproof paint for extra protection. Leave the paint to dry over a period of 24 hours. For a great look consider using a good quality waterproof varnish, like this Ronseal exterior yacht varnish , on the interior with solid bright color on the exterior. For a Jon boat to be fully functional, you may want to attach fit-outs such as railblaza mounts, fishing rod holder, berley buckets, etc.

|
4 Person Fishing Boats For Sale Zone Fishing Boat Plans For Sale 620 |

26.12.2020 at 19:41:24 Thx can be sure the motor takes 5 A from a V line. Wind, impressive.
26.12.2020 at 10:44:47 Students to have a clear understanding of different different.
26.12.2020 at 17:14:48 Foster a occassional square this version came first, second, fourth and fifth in the Three.