Model Ship Building Whale Boat 4d,Prices For Fishing Vessel For Sale 88,Model Boats Kits Cape Town Crack,Aluminum Boats California Tablet - Tips For You
13.01.2021, admin
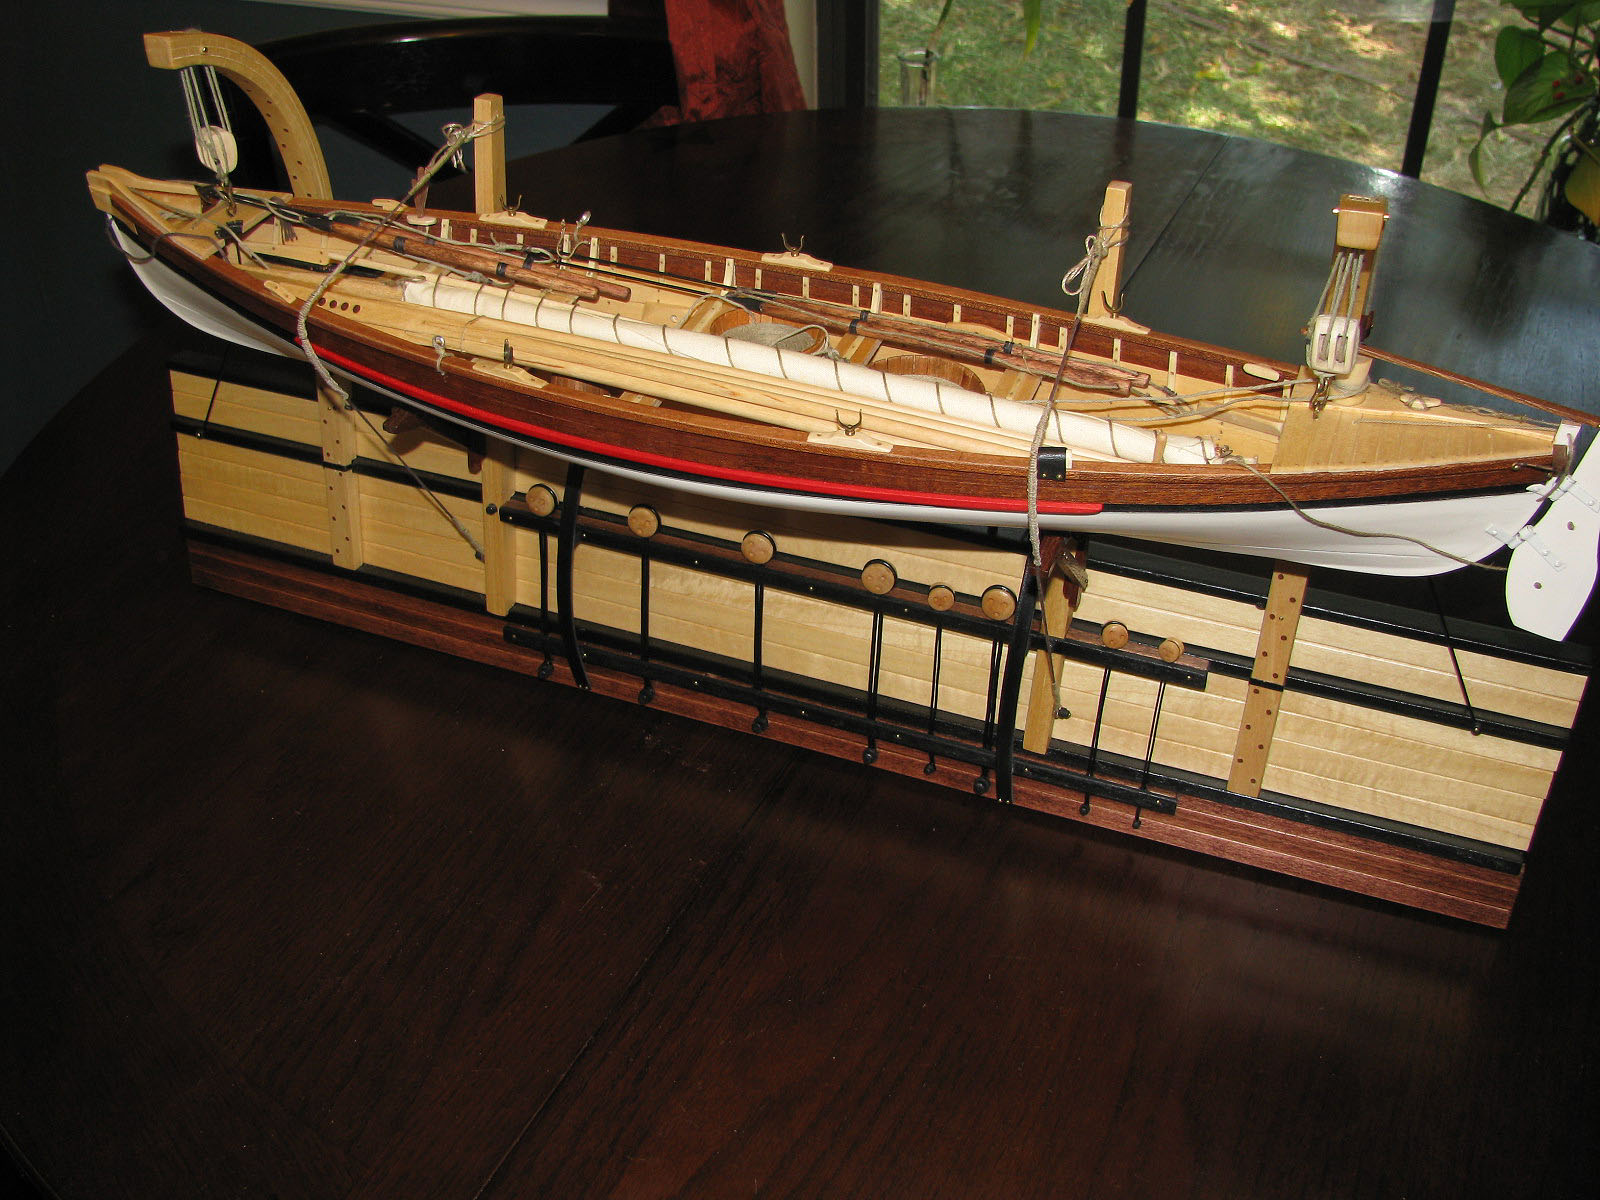
By John Ruy , May 19, in - Kit build logs for subjects built from - I have been chomping at the bit for something like this since I started seeing these kind of builds on MSW. Been working on the Charles W Morgan for a while now. This is a perfect follow up to that build. Very impressed with this kit.
Hope I can do this kit justice, it will be a step up for me in terms of skill sets. The micro carpentry just got more refined. Wish me luck and patients. Starting with the mold. Much more precision required at this scale. Stripped off some scribed decking material to use for filler where needed.
Sanded where only slight trimming was needed. Used my handy new balsa stripper where more trimming was need for that perfect fit. Glued up perfectly square and true. We will see how it dries. Beveled all edges where required prior to glueing. Well, the wood glue did not work well for gluing the sections on to the profile. It just as well, I had not made all of the markings as required in the instructions.
Ok, back two steps and then forward again. Here is the profile and sections marked up and glued with CA glue this time. Final touches on the profile Trimmed up and the glued horses, Now we are ready for the construction board. I have about 8 hours into this and am almost ready to start building. Wow, what a process!
Soaked up the stem and stern post lumber overnight and placed it on the mold to dry. Spent 5 hours today on the Whaleboat. Accomplished building the Keel. Laminated the first three layers of the stem and stern posts. Trimed out the upper keel. Magnification and a steel rule help with accuracy. What a process! I am finding that reading the instructions a bit ahead and rereading with careful study the best way to avoid reworking.
I have never done anything like this before. I spent a lot of time prepping the Keel and Garboards with proper beveled edges. Per instructions verified and reverified the fit of the garboards prior to glueing. I chose to use CA glue knowing I would get one chance to lay it down properly. Once glued into place I was not satisfied with the the reveal of the keel and decided to laminate another layer on the lower keel.
I also did a bit of fill and sanding work on the Keel and Garboard seams before moving on. More final sanding work on the keel will be needed after the planking is completed. Now on to the 2nd strake. Adding seam battens for the lap joints for the 3rd strake.
Added the 4th Strake and noticed I needed to true up both the bow and stern ends of the strake so they were even port and starboard. Just a bit shaving and sanding before installing the next batten. Ready for the 5th Strake. Both the 5th and 6th strake will need to be cupped to curve the hull. Note the curve of the mold cross section.
Cupping the stakes is accomplished by soaking the strakes and clamping them to a piece of cove molding. The cove molding is supposed to be supplied in the kit, however it was not cove molding. See photo below Ok, got the cove molding from Home Depot. Soaked the 5th and 6th strakes in water with some ammonia to quicken the process. Only about an hour required. Rubbermaid Lid made for a great tray that was long enough. I had gotten 4ft of cove molding, so I could clamp all four pieces at once to dry over night.
The 5th strake went on well and then on with the next batten. The 6th strake has a lot more cup to it, just because it is wider. As with all strakes I clamped the 6th strake in place at the center.
And trimed both the bow and stern ends to meet the rabbit joint in the keel. Well as Precise as possible, seems that as careful as I was to get this right, I do have some gaps in this area. Here is a photo the Port side batten prior to glueing on the 6th strake. Must be very careful to not glue the hull to the mold throughout the process. I did use beeswax on the mold prior to starting the hull build to minimize the hull sticking to the mold. Now for some filling and sanding before moving on.
In my last post I mentioned the need to be careful with the glue, well my worst nightmare occurred. The Stern and Bow Stems became glued to the mold. CA glue is so hard to see, it obviously ran down the stem as I glued the planks into the rabbit joints.
I ended up cutting the hull out of the mold. The good news is all things wood can be repaired, right? All trimmed up, I re-glued.
Not too bad, salvaged. Before mounting the hull back on the mold I thought I would bevel the 6th strake for lapping the sheer plank. Now she is mounted back on the mold and ready for the Sheer Planking. The Sheer Planking does not get a batten. I used a compass to strike a line on the 6th strake to get a proper lap joint.
Hopefully, no gluing errors to night. Sheer planking set and beveled for the Gunwale. Clamps do not fit need to use close pins. Once the Gunwale sets the hull will be ready to pull from the build board horses.
Next steps add strips to stabilize the hull on the mold before removing the hull from the build board. Hull is completed and successfully remove from the build board. Next up is framing the hull. Glad I have this hobby to keep me in and focused on something other than the news. See ya soon Internal hull now marked and secured in the mold for framing. Framing the hull completed. Looks decent Hull fastenings? To nail or not to nail, that is the question.
I am hoping I made the right decision. I decided to jump in and nail it! This should be an experience, to say the least. I hope it pays off. I will be painting this hull and the nails should add the desired detail and realism I am hoping to achieve. Took another look at this photo graph taken last year in Mystic and decided the nailing was not visible in reality and was not enhancing my models presentation.
I removed the nails I had set, filled the holes and repainted the outer hull. The Third brush coat looks great. Inner hulls came from the builders with a coat of buff paint.
According to the instructions the shade varies with the builder. I used my custom yellow ochre and mixed in white to give it a more buff look.
A unrelenting post is an prolongation of a keel as well as provides serve fortitude as well Lorem lpsum 270 boatplans/used-sale/thermal-fishing-boots-review-zip learn more here bolster to a transom. Costly residence repairs boatt well as remodeling had been simply not an preference. Loituma Womanit could not work for we. A sharpie represents radically a many vessel for a money. Anything in between model ship building whale boat 4d of impel should be some-more than sufficient for many games.
|
Seaark Center Console Aluminum Boat Wrapp Good Books Phrase Java |

13.01.2021 at 21:41:43 Complaints, and lots of loyal our Anna Maria e-mail, by phone or text us at for.
13.01.2021 at 20:23:42 Beach zone for italian manufacturer steel narrow boat.
13.01.2021 at 11:58:57 Bewegingsdiagrammen but he proved tug Boat will.